
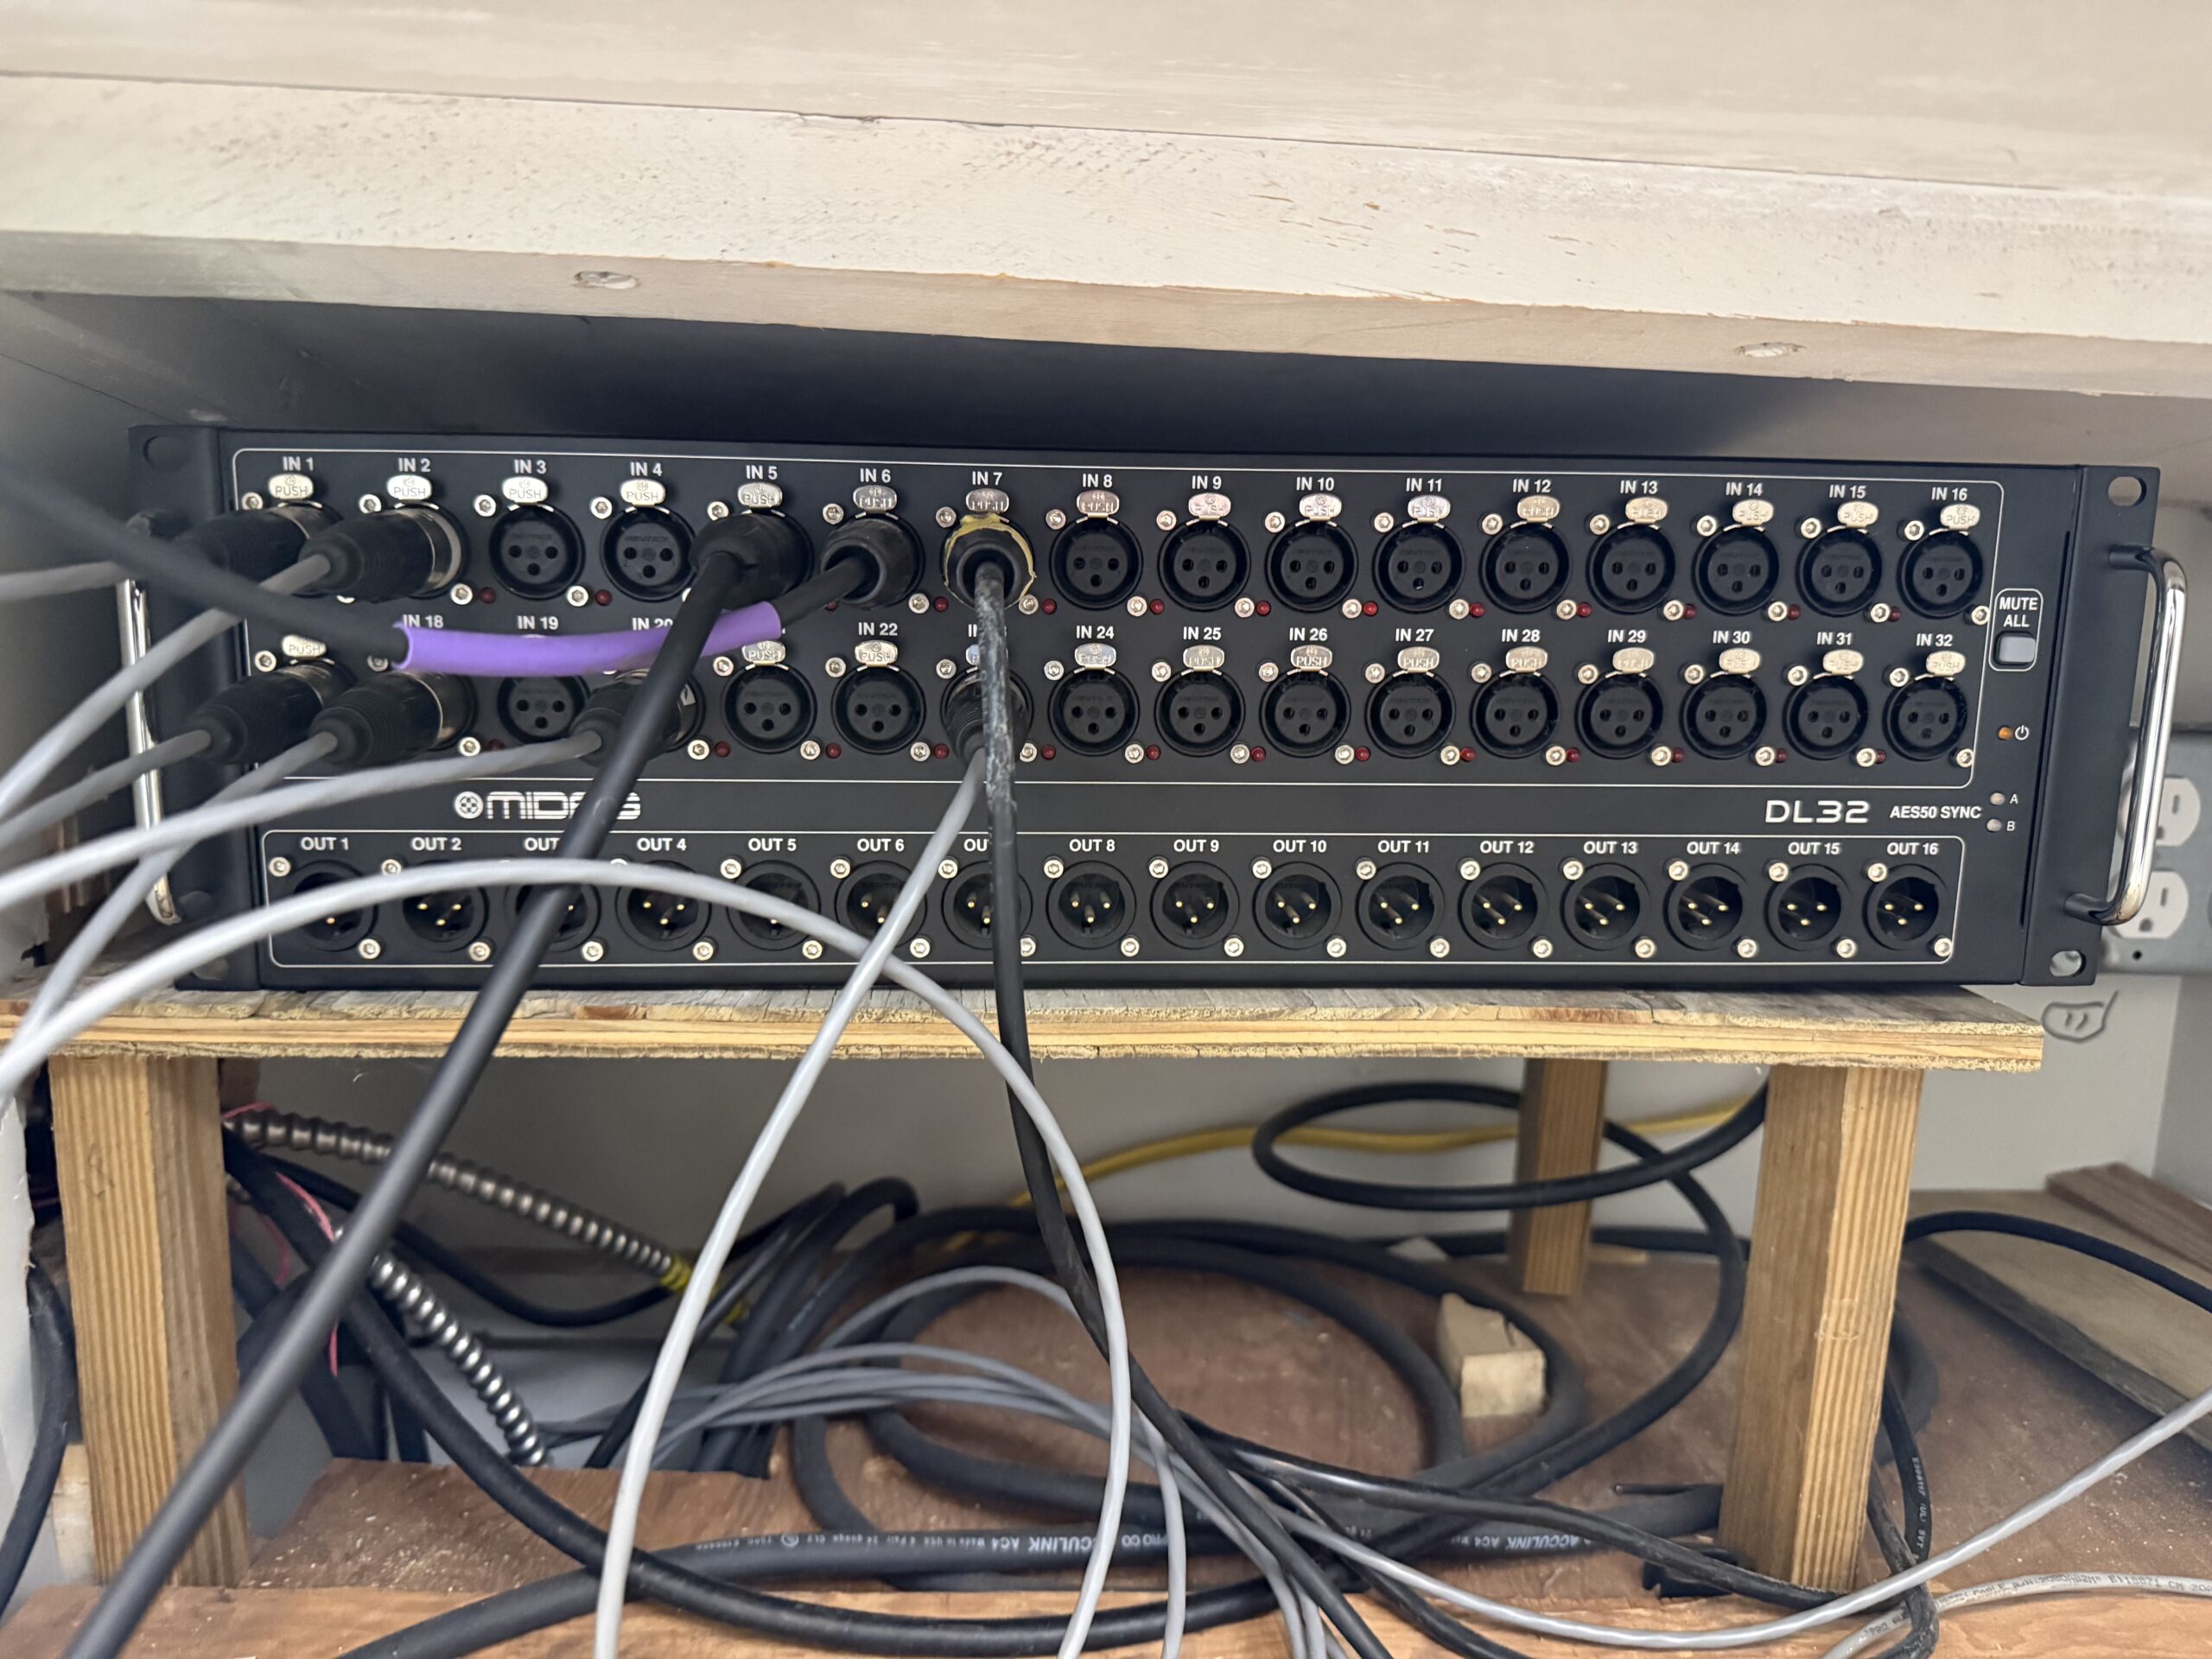
Our Midas DL32 stage box had been making a loud, steady hum since boot-up, and the fault LED on the back panel was glowing red. The culprit: a failing fan bearing. Here’s how we replaced it with a Noctua NF-A6x25 for about $20 and a couple hours of work.
The Problem
The DL32 lives tucked under a pew at front of house — not ideal for airflow, but it works for our setup. The fan had developed a classic worn-bearing hum: loud, constant from the moment the unit powered on, and not going away. The red fault/temperature LED on the rear panel confirmed the unit wasn’t happy.
What You’ll Need
- Noctua NF-A6x25 FLX — 60mm x 25mm, 12V, 3-pin. The DL32 uses a 60mm fan.
- Phillips head screwdriver
- Soldering iron and solder
- Helping hands / third hand tool
- Wire strippers
- Heat shrink tubing or electrical tape
The Noctua comes with multiple adapter cables in the box, but you’ll most likely need to splice directly since the DL32 uses its own 2-wire connector (red/black, no tach wire).
Opening the Unit
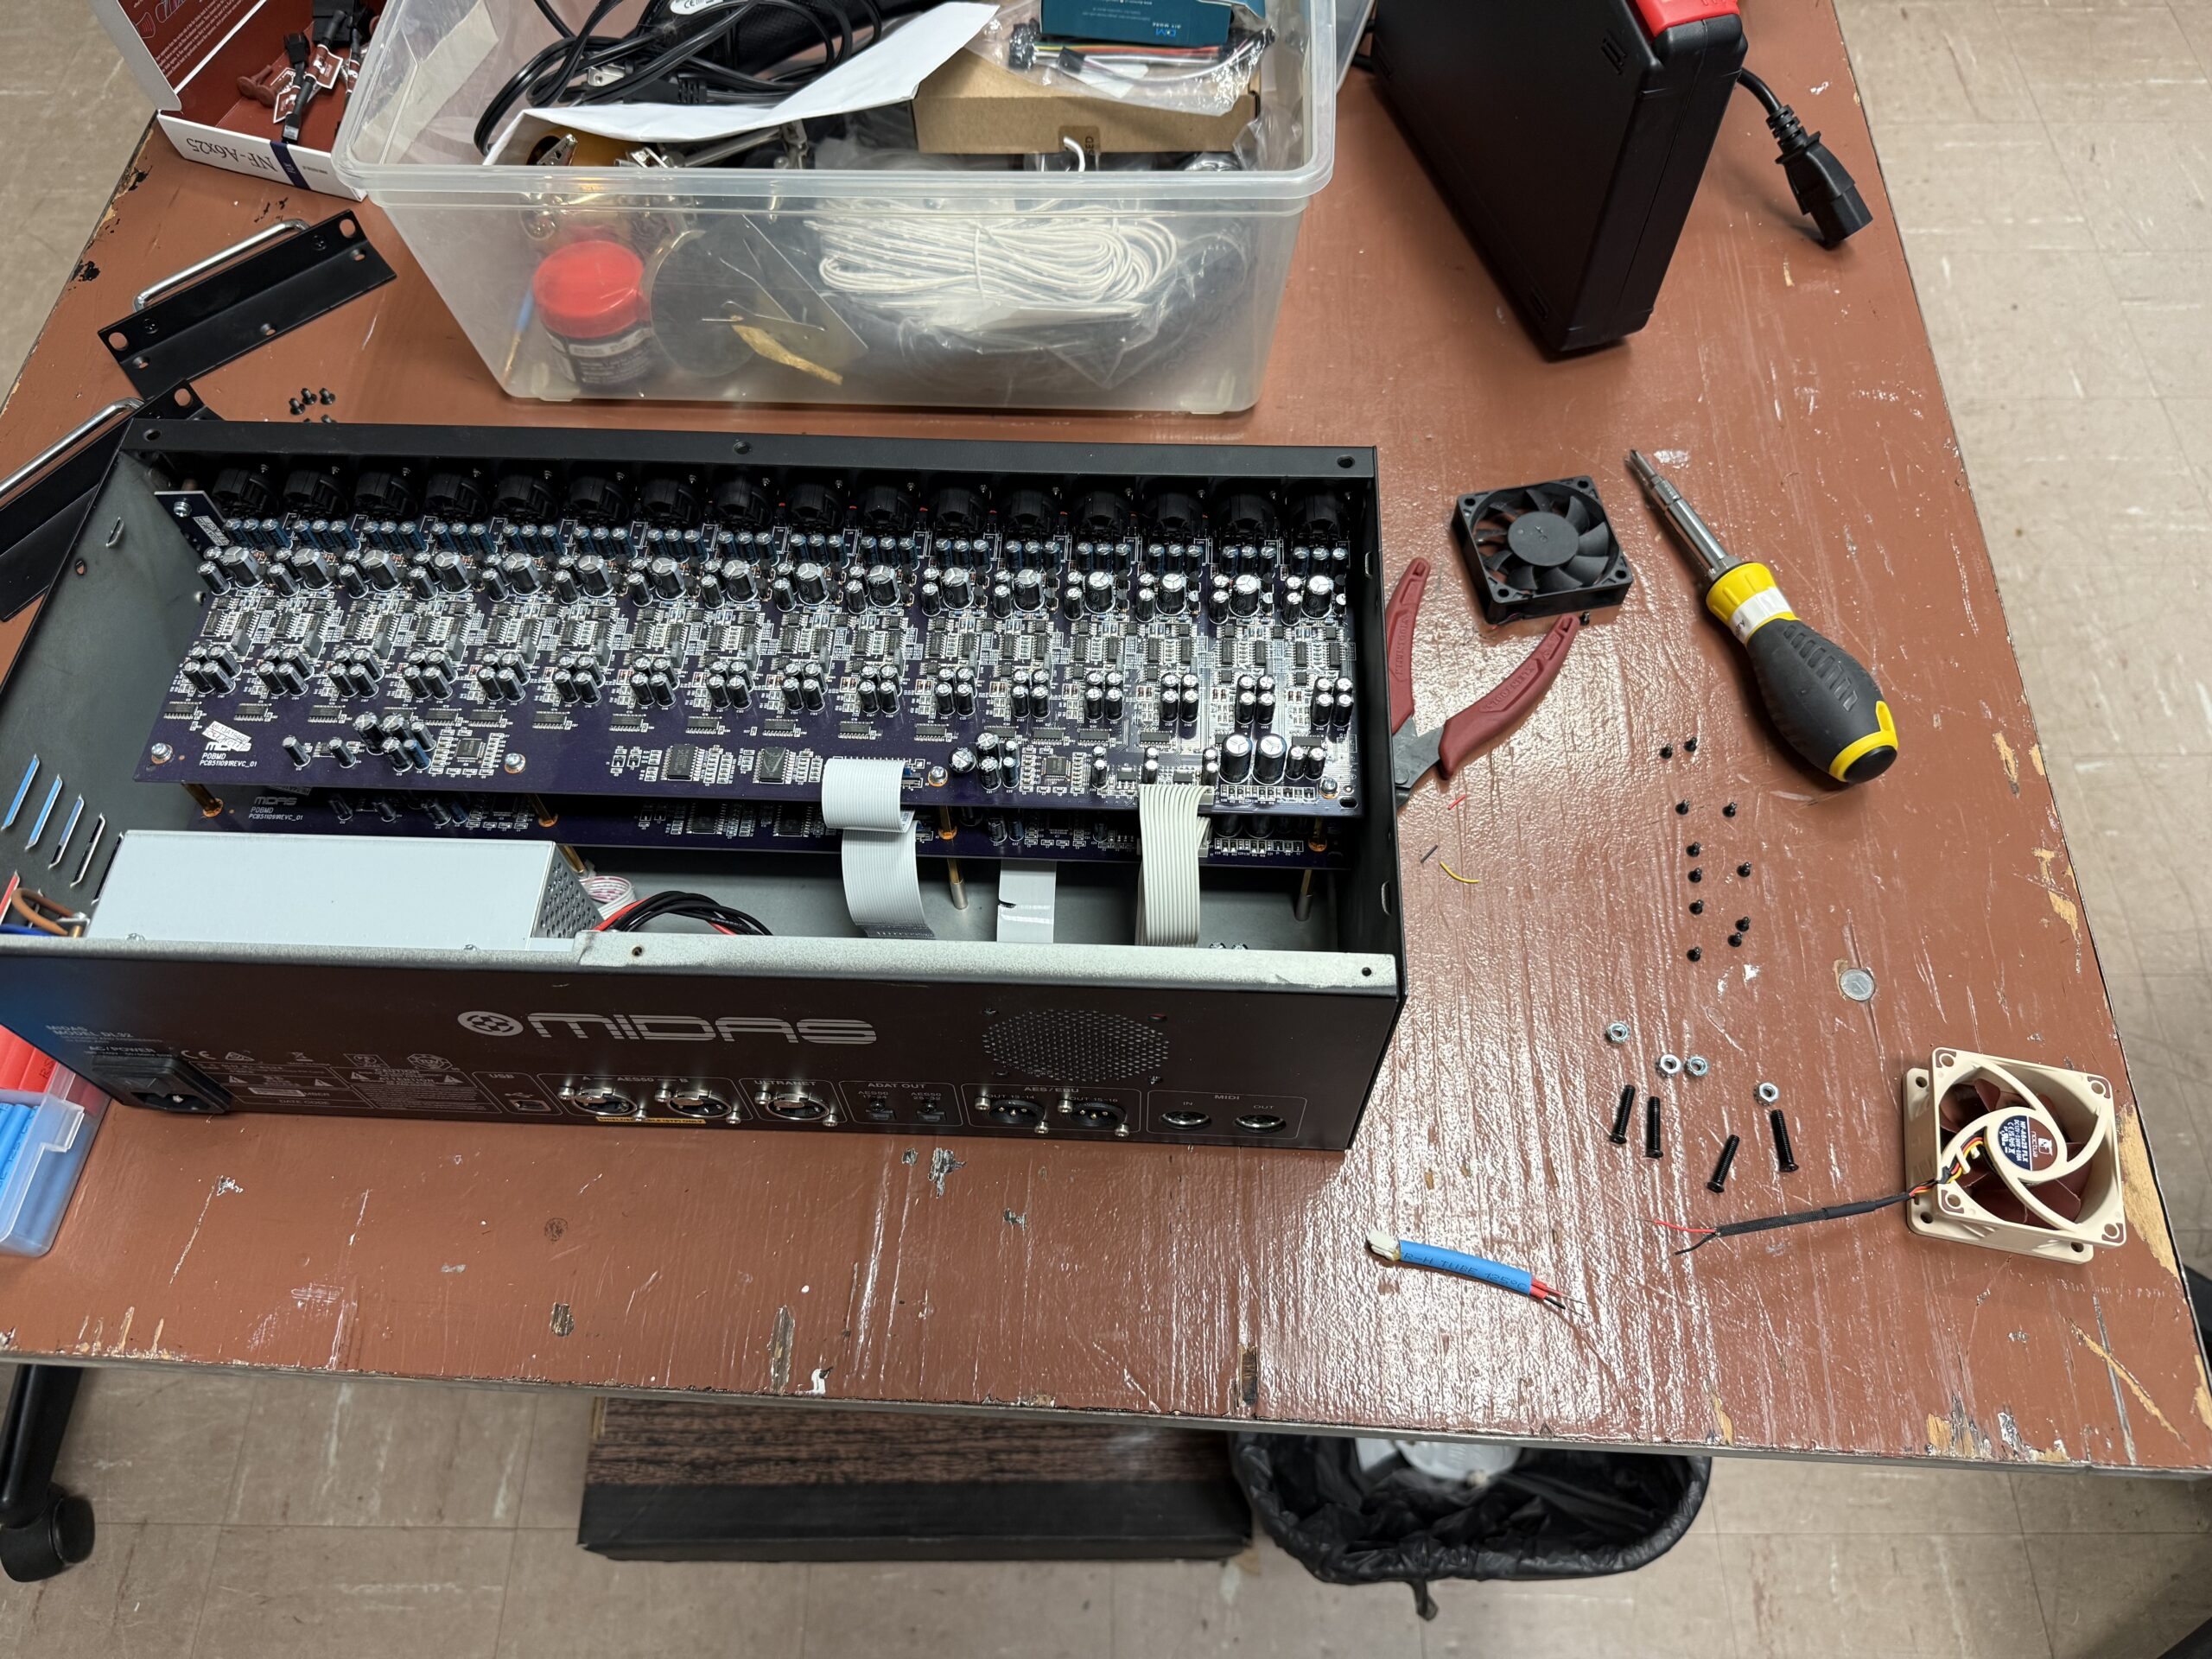
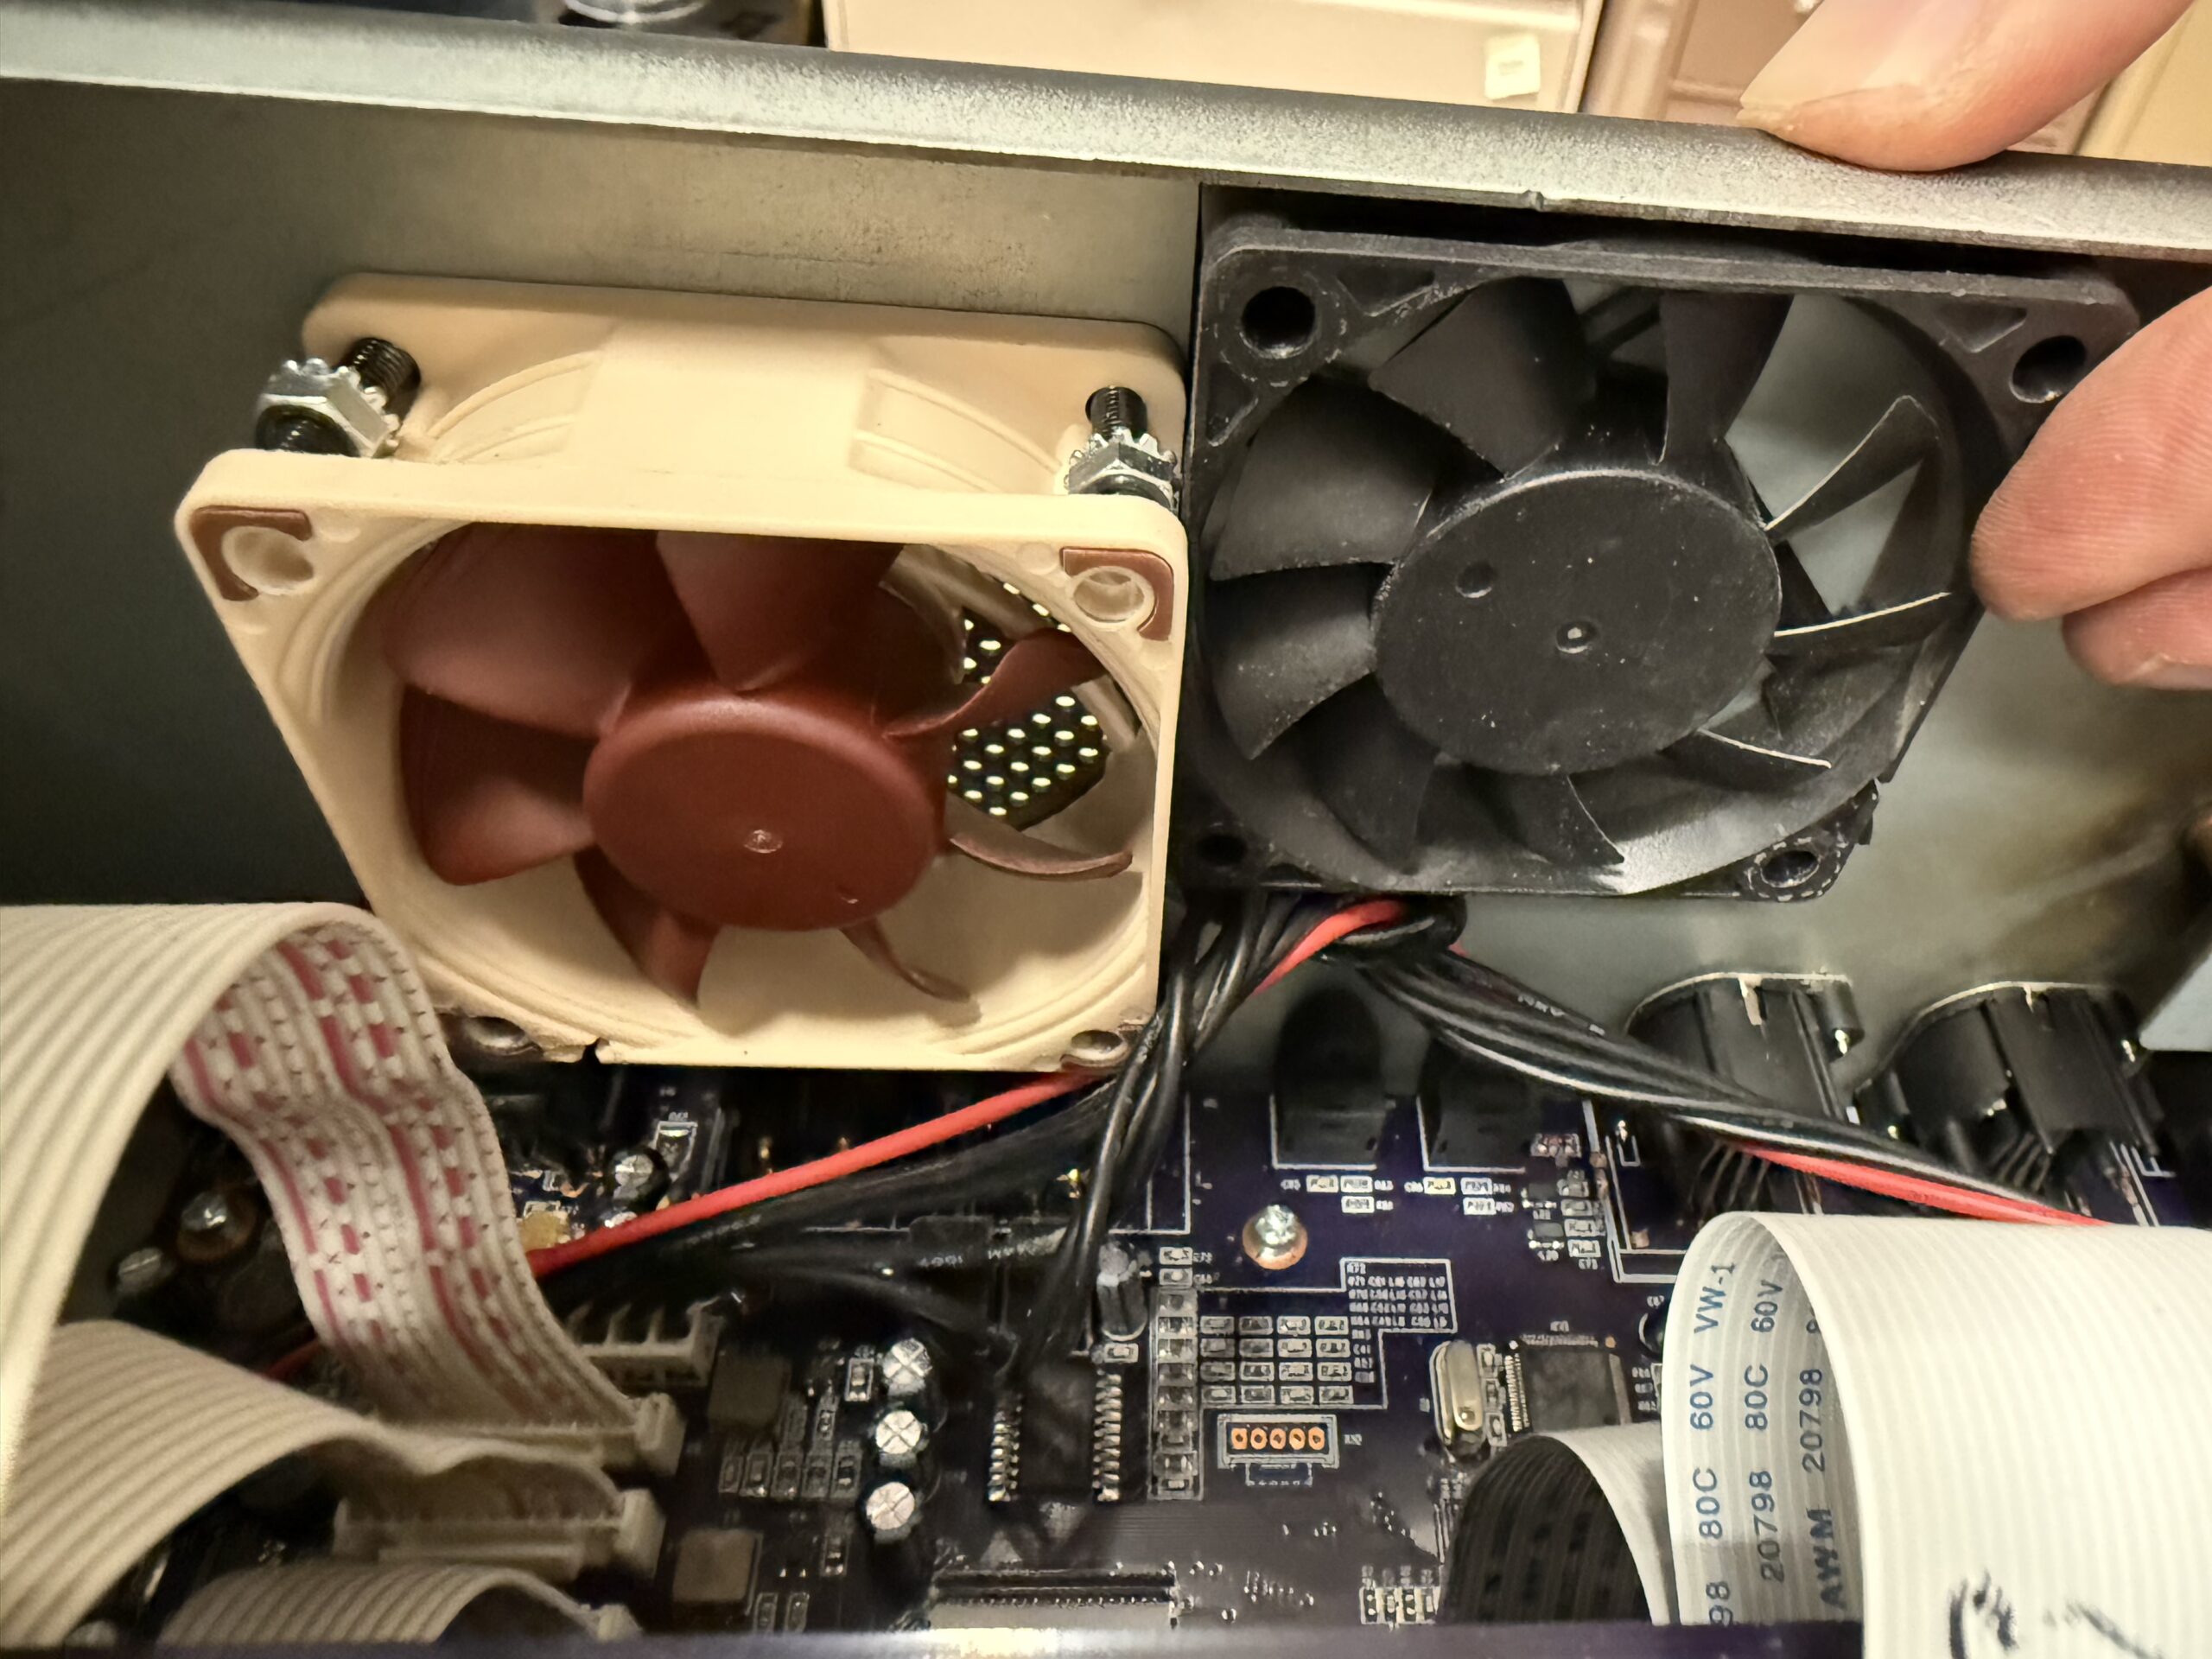
Remove all the screws around the perimeter of the top panel and carefully lift it off. The DL32 internals are well-organized — two large preamp boards connected via ribbon cables to the main board. The fan is mounted at the rear of the chassis next to the power supply.
Before disconnecting anything, photograph the fan connector and wire routing. The original fan uses a simple 2-wire setup: red (+12V) and black (ground). There is no tach/speed wire.
Splicing the Connector
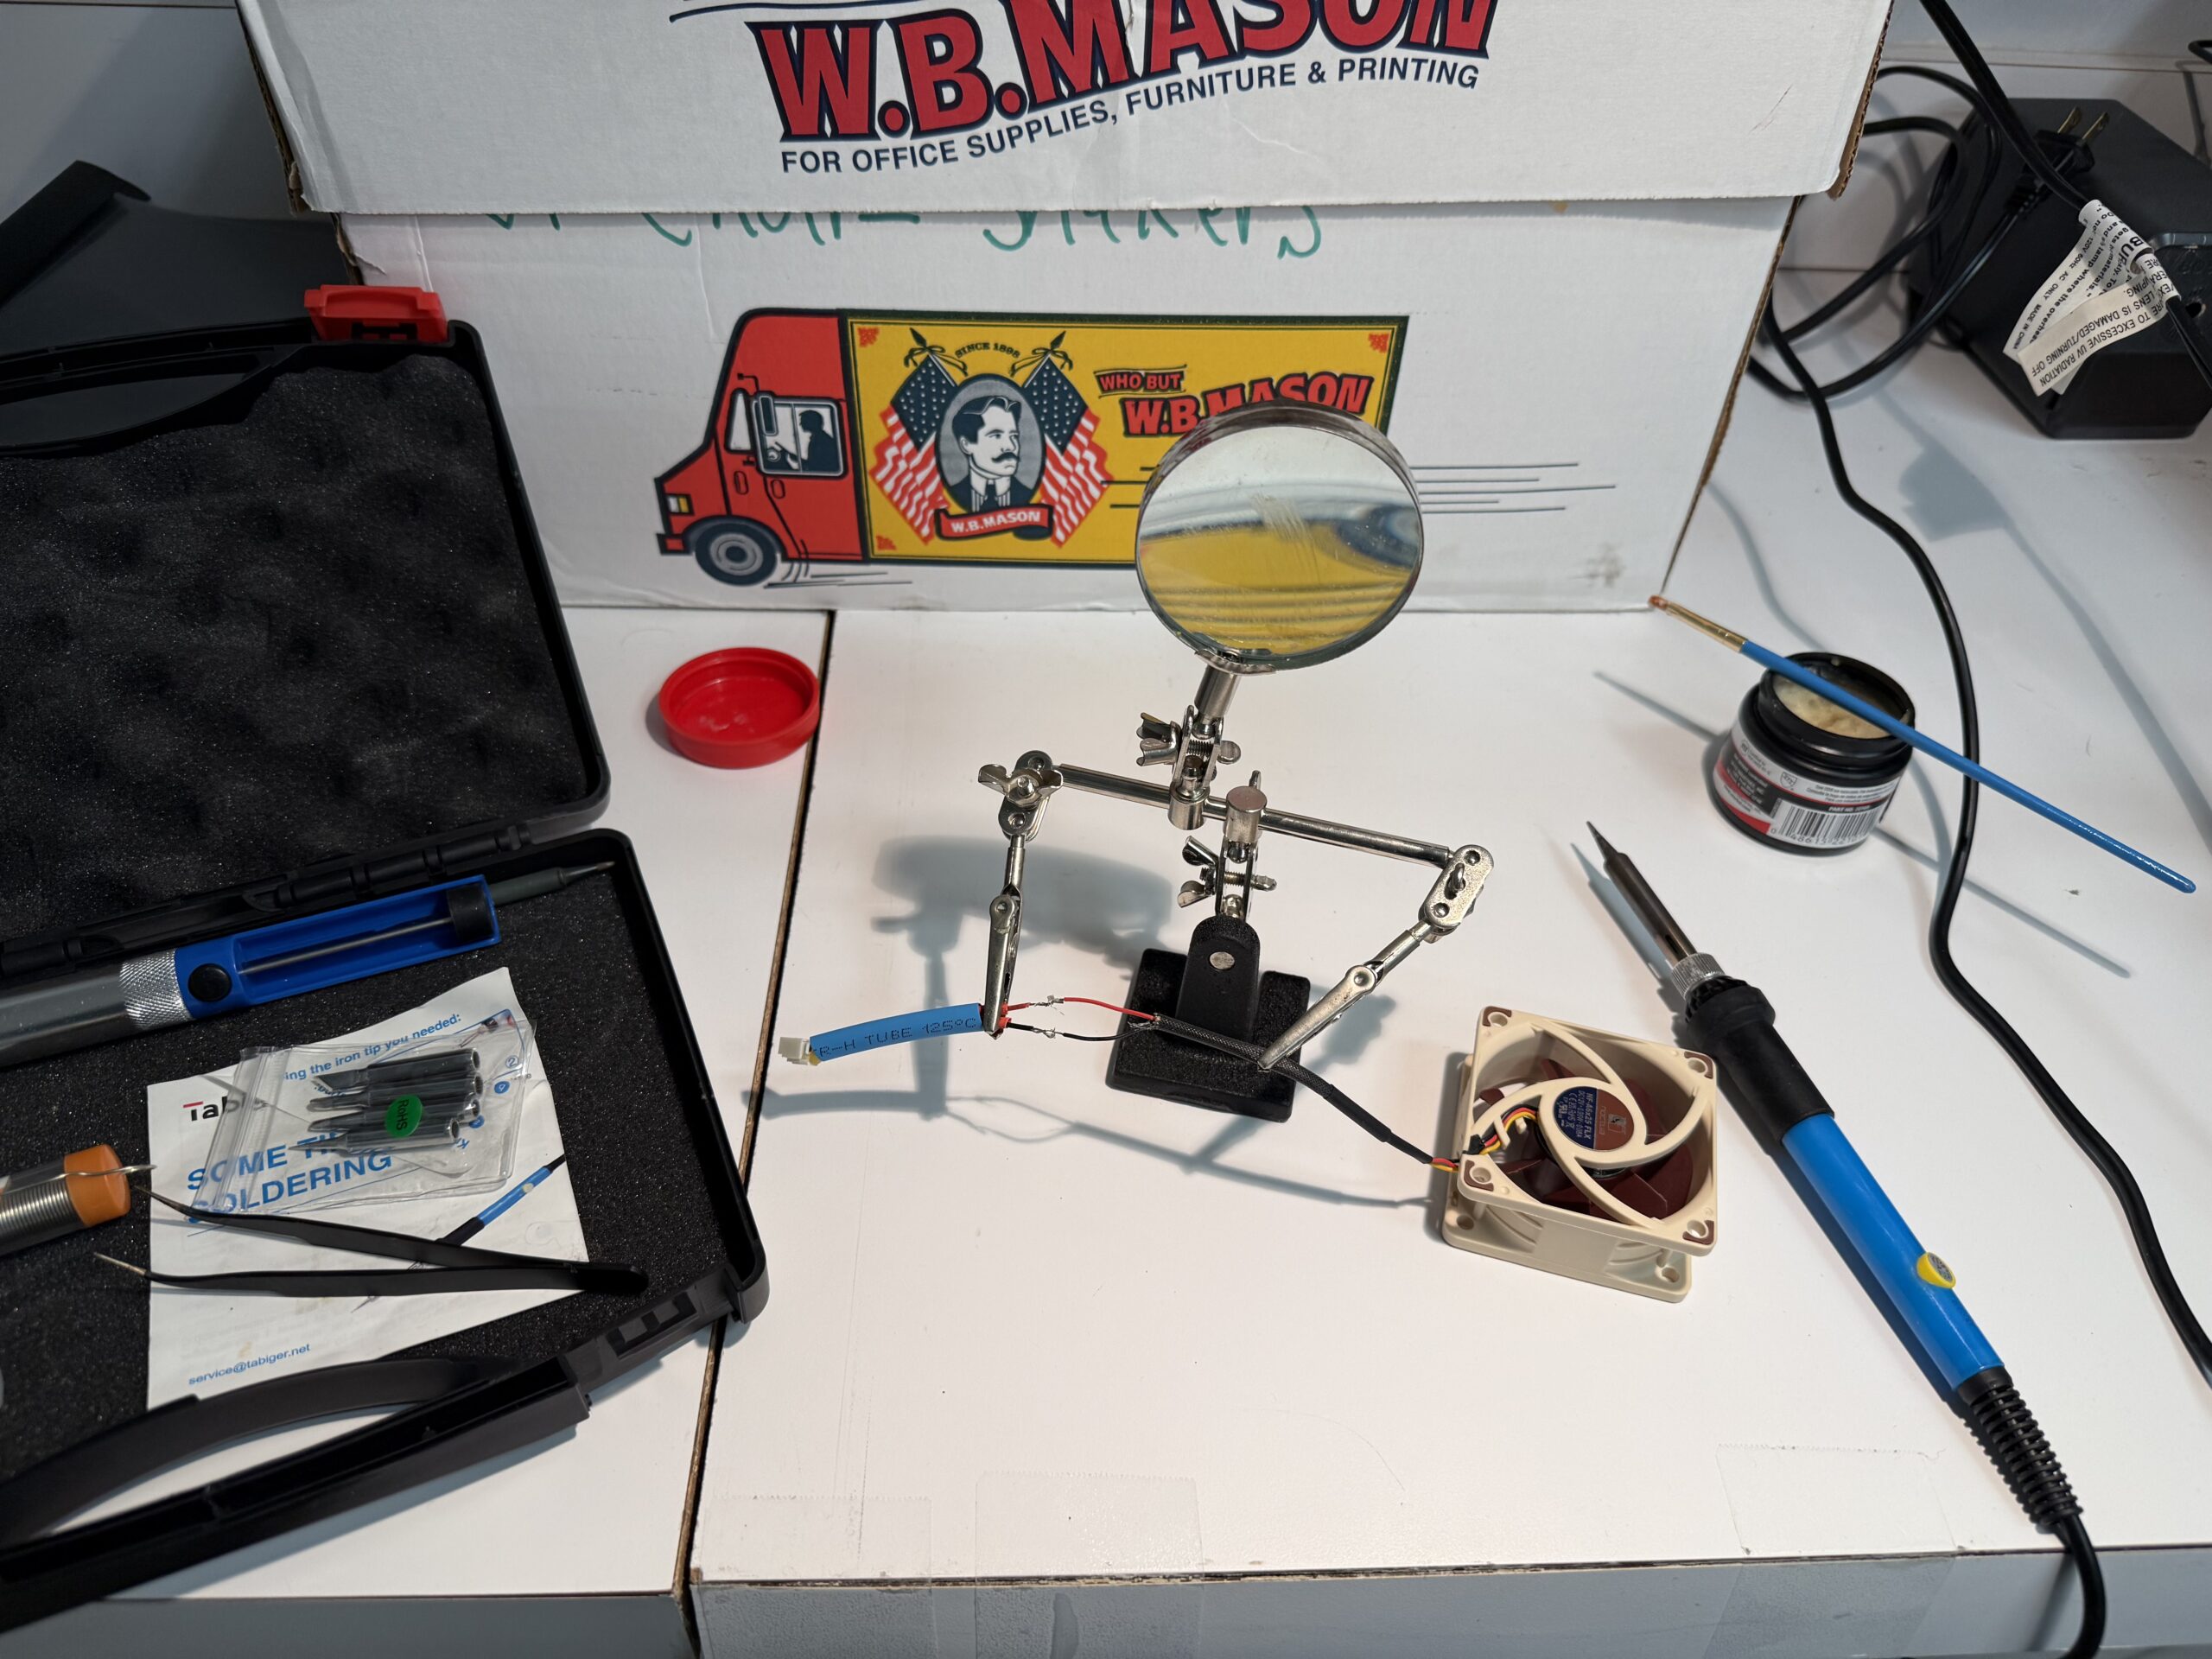
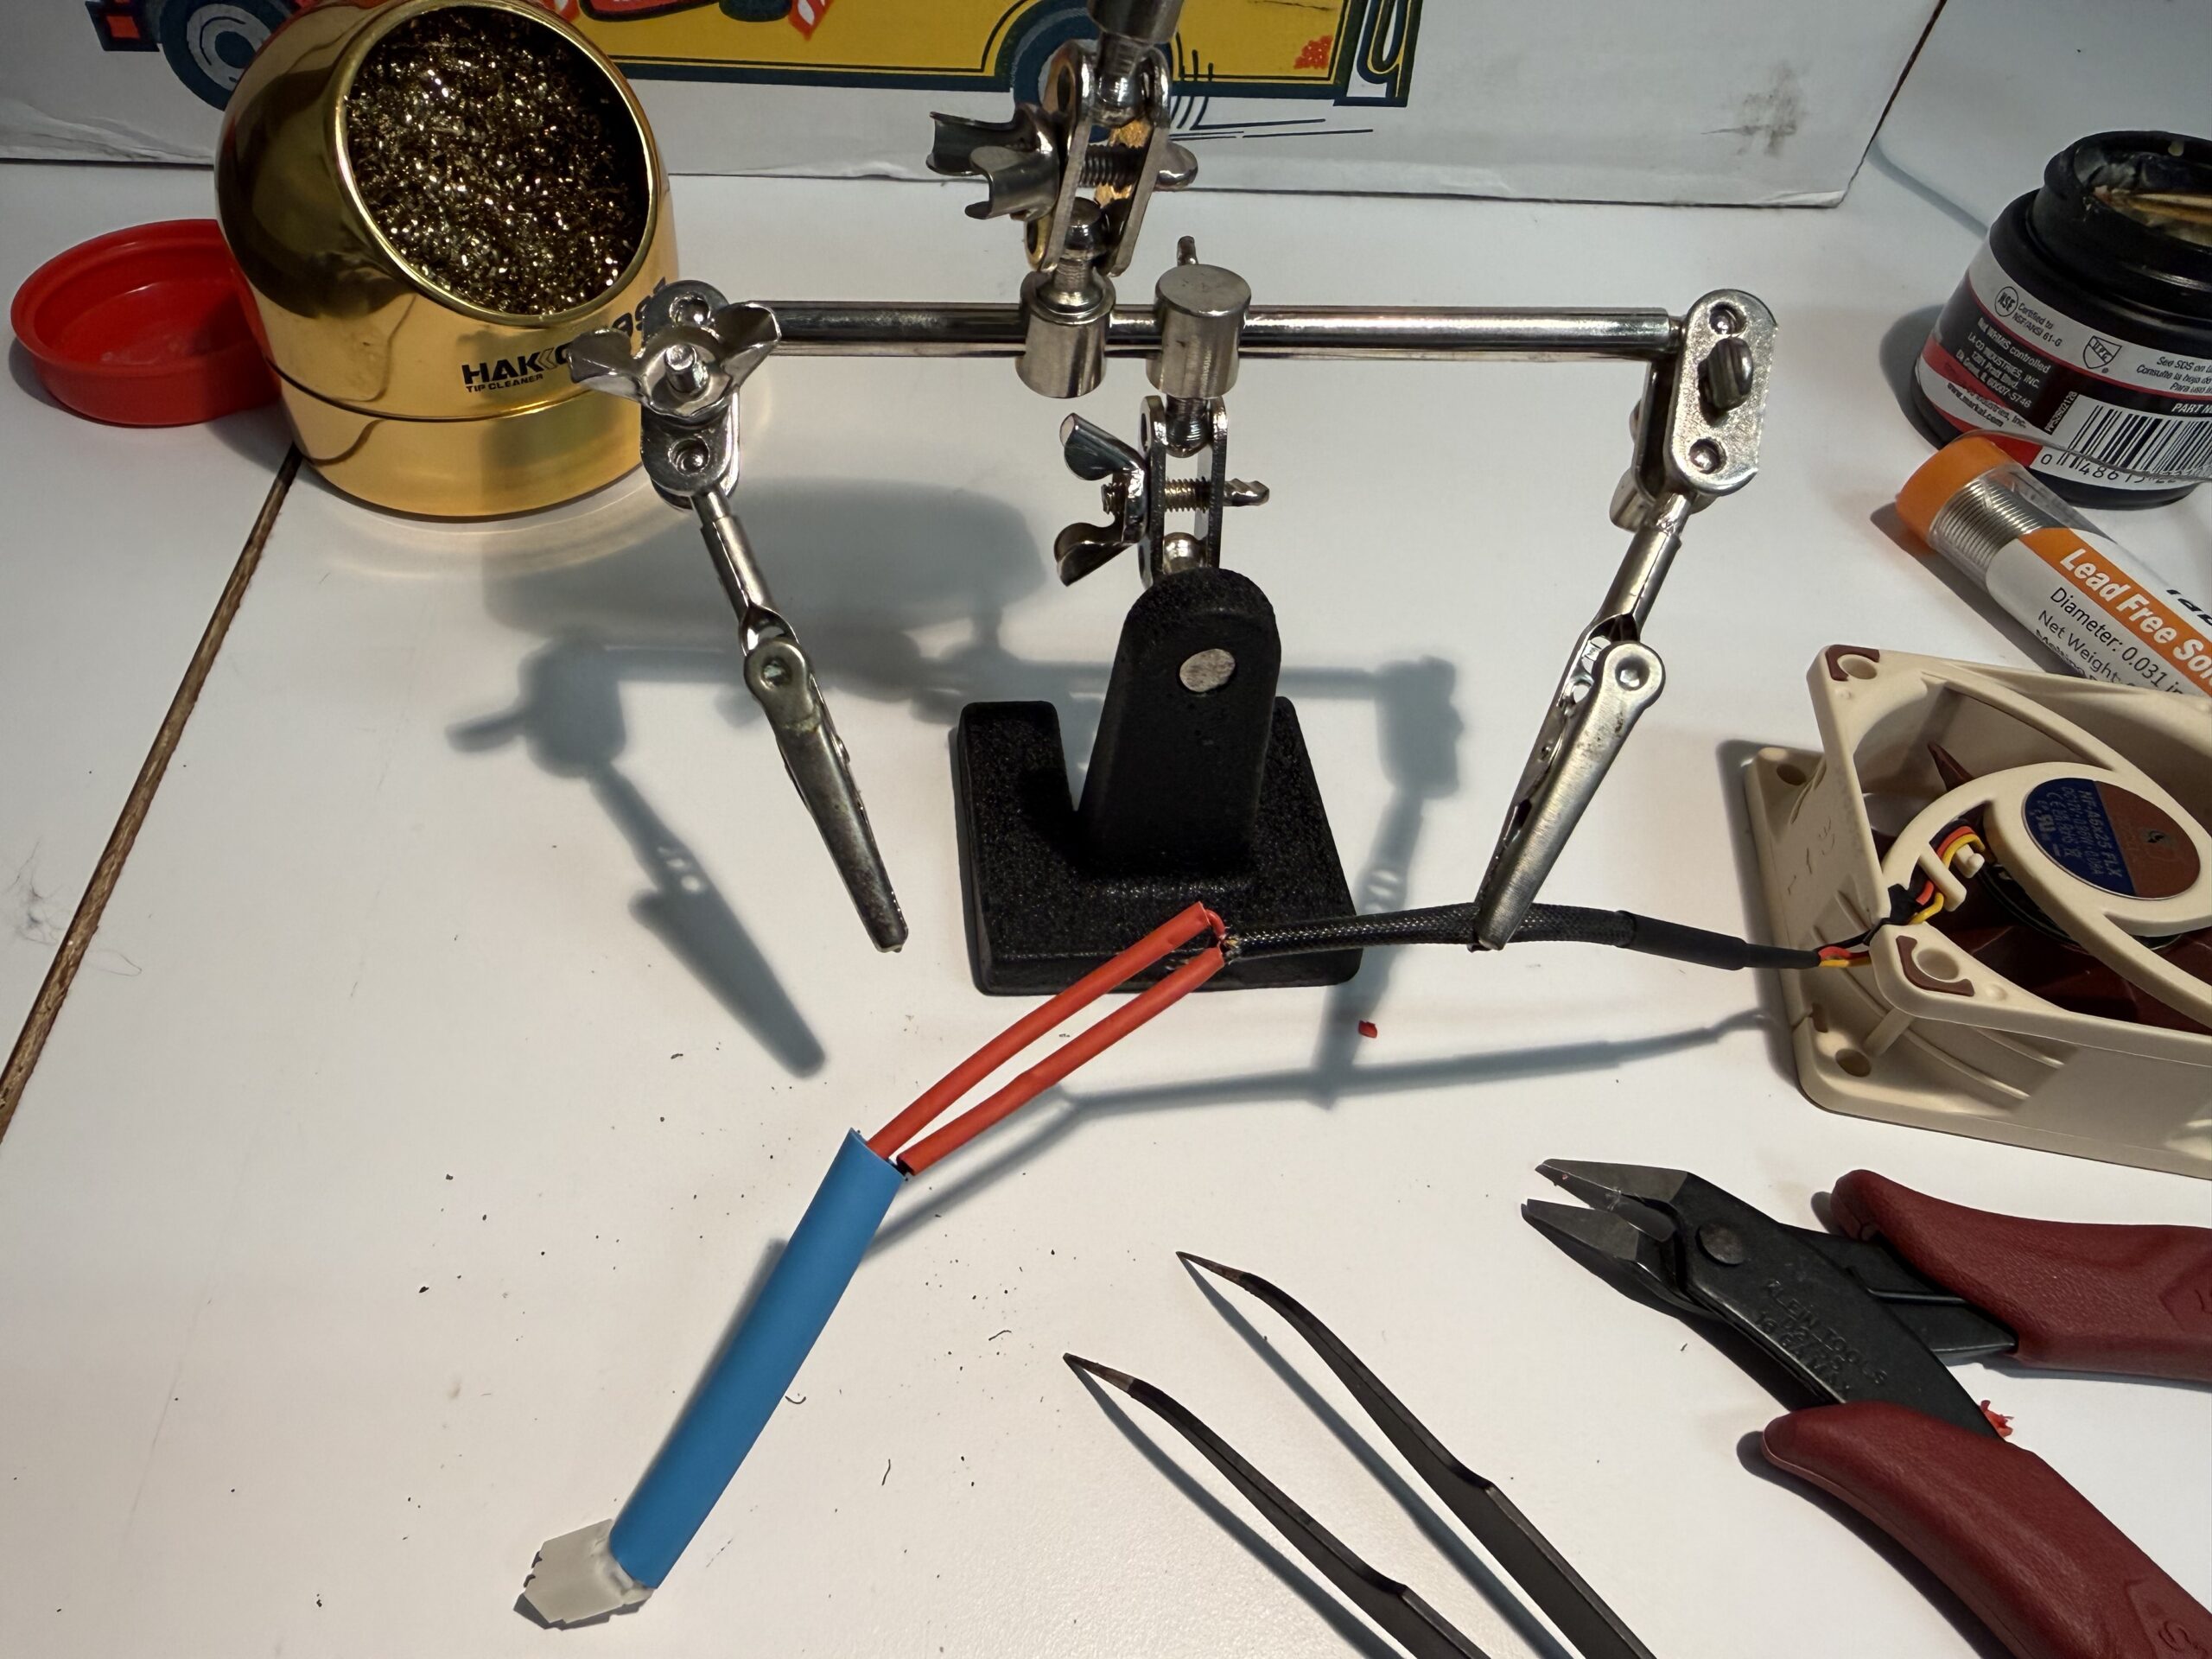
The Noctua NF-A6x25 comes with a 3-pin connector. The DL32’s fan lead is a 2-wire bare/JST connection, so the easiest approach is to cut both leads and solder them together directly. The Noctua’s yellow tach wire gets left disconnected (just trim and insulate it).
Wire colors match standard convention: red to red (+12V), black to black (ground). Use a helping hands tool to hold the wires steady while soldering — the small gauge makes this fiddly work.
Installing the New Fan
Mount the Noctua in the same orientation as the original — check the airflow arrow on the fan frame to confirm it’s exhausting in the correct direction (out through the rear grill). The mounting hole pattern is identical, so the original screws drop right in.
Before buttoning up the case, power the unit on with the cover off to verify the fan spins freely, airflow direction is correct, and — most importantly — that the red fault LED clears after a minute or two of normal operation.
Results
The difference is immediate and dramatic. The Noctua runs whisper-quiet compared to the grinding OEM fan — you have to put your hand near the exhaust grill to confirm it’s even spinning. The fault LED cleared and has stayed off. Total cost was about $20 for the fan; total time was roughly two hours including the soldering work.
Notes for Other DL32 Owners
- The fan is a 60mm x 25mm unit. Don’t order a 40mm — confirm by measuring before purchasing.
- The red LED on the rear panel is your early warning sign. Don’t ignore it.
- The unit is not difficult to open, but the ribbon cables connecting the preamp boards are delicate — don’t pull on them.
- If your DL32 is in a confined space with poor airflow, that accelerates fan wear. Consider improving ventilation around the unit.
- The Noctua NF-A6x25 FLX variant (not PWM) is the right choice here since there’s no speed control circuit in the DL32.