Object detection on Jetson Nano

I’ve been learning about AI and computer vision with my Jetson Nano. I’m hoping to have it use my cameras to improve my home automation. Ultimately, I want to install external security cameras which will detect and scare off the deer when they approach my fruit trees. However, to start with I decided I would automate a ‘very simple’ problem.

Take out the garbage reminder

I have for some time had a reminder to bring out the garbage, to bring it in, and a thank you message once someone brings it in. This is done with a few WebCore pistons:
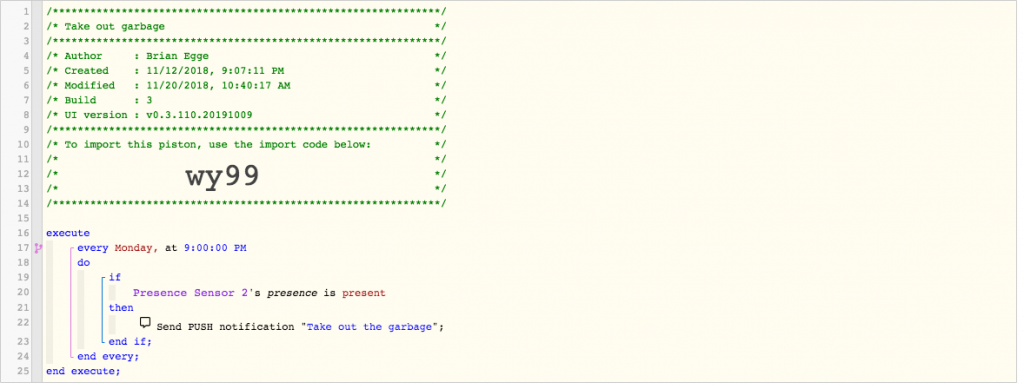
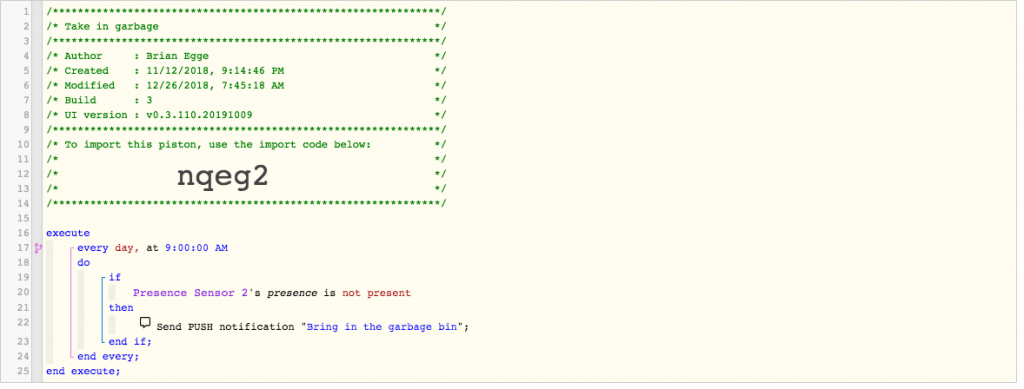
In order to decide if the garbage is in the garage or not I’ve attached a trackr tile which is detected by my Raspberry Pi 3. Unfortunately, if the battery dies or gets too cold it’s stops working. I could attach a larger battery to the tile, but it needs to be attached to my bin, so I don’t want something too big. So decided it should be trivial to have a camera learn if the garbage bin is present and then update the presence in SmartThings. It took me but a few minutes to train an object classification on https://teachablemachine.withgoogle.com/, so I thought this was doable.

First I mounted a USB camera to the ceiling in the garage and attached to the Raspberry Pi. I then spent a few days learning how to access the camera, and my options to stream from it, etc.. ultimately, I decided to use fswebcam to grab the images.

fswebcam --quiet --resolution 1920 --no-banner --no-timestamp --skip 20 $image

Once I had a collection of images, I installed labelImg on my nano. This is because for this project I didn’t just want to do image classification but object detection. In hindsight, it would have been much simpler to crop my image to the general area where the bins reside and then train an object detector.

After assembling about 20 images I then copied around scripts to create all the supporting files for TensorFlow. I went from text to csv to xml to protocol buffers. In the end, I had something ready to train. I attempted to train on the Nano, but soon came to the realization it was never going to work. My other PCs don’t have a modern GPU for running AI tasks, so my hope was to get it to work the with Nano. I learned about renting servers but that was going to add costs and complications. I then learned about Google Colab, which (for now), gives you free runtimes with a good GPU or TPU. Once running you’ll find out what kit your runtime has. I’ve gotten different hardware on different runs. My last run used the Tesla P100-PCIE-16GB. That’s a $5,000 card which not even NVidia is going to let me try out for free.

It look me a long time to get the pieces together in one notebook to be able to train my model. Certainly not the drag and drop of the Teachable Machine.

One thing which helped a lot was tuning the augmentation items. I know the camera is fixed so I don’t need to have it flip or crop the image. Since the garage has windows the lighting can change a lot depending on the time of day. I didn’t setup TensorBoard, but it quickly goes from 0.5% loss after a few steps. I have a small sample and a fixed camera, which helps.

  data_augmentation_options {
    random_adjust_brightness {
    }
  }
  data_augmentation_options {
    random_adjust_saturation {
    }
  }

Once running in the notebook I then spend another few days getting the model to run on my Jetson Nano. NVidia did not make this easy. Ultimately, I downgraded to TensorFlow 1.14.0 and patched one of the model files. Eventually I got it running, then I just needed to get it to work with SmartThings. Since the bins are really only going to move when the garage doors open, I don’t need to do this detection in real time. I want WebCore to query the garage when it detects the doors open or close. I have it do this by querying a web service on my Raspberry Pi:
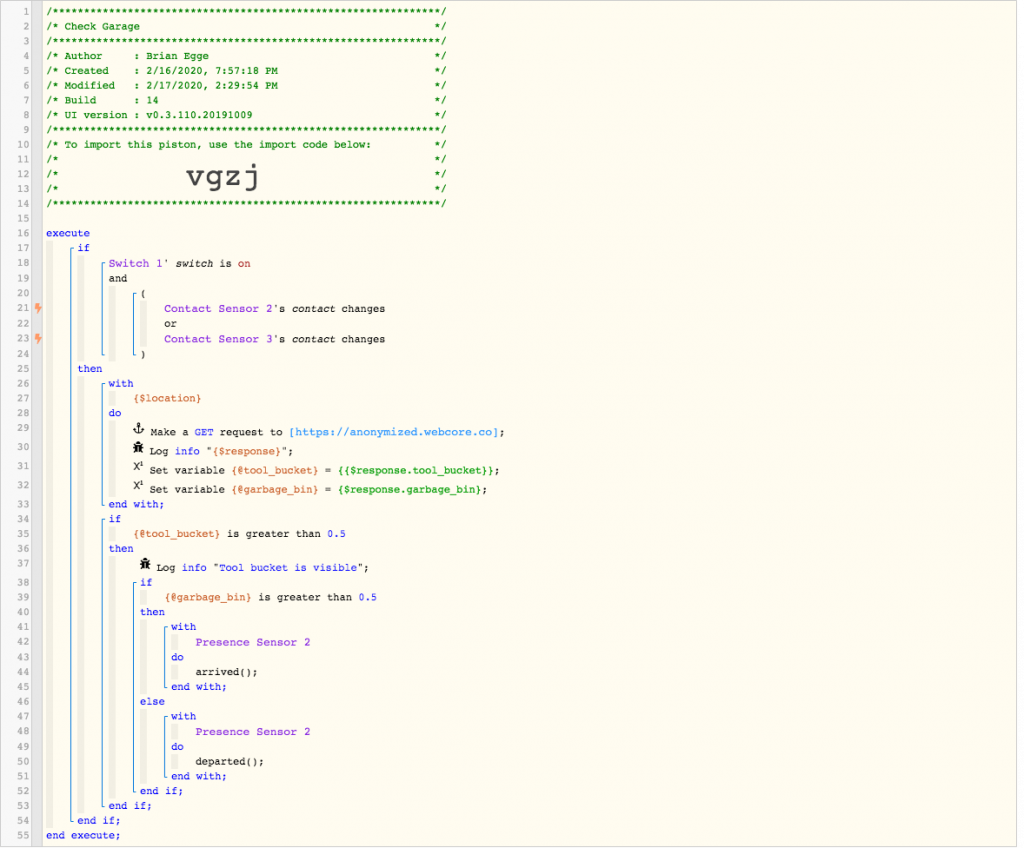
On the Raspberry Pi, I want it to snap an image, and send it to the Jetson for analysis. I wrote the world’s dumbest web service, installing it with inetd:

#!/bin/sh

0<&-
image=$(mktemp /var/images/garage.XXXXXXX.jpg)

/bin/echo -en "HTTP/1.0 200 OK\r\n"
fswebcam --quiet --resolution 1920 --no-banner --no-timestamp --skip 20 $image
/bin/echo -en "Content-Type: application/json\r\n"

curl --silent -H "Tranfer-Encoding: chunked" -F "file=@$image" http://egge-nano.local:5000/detect > $image.txt
/bin/echo -en "Content-Length: $(wc -c < ${image}.txt)\r\n"
/bin/echo -en "Server: $(hostname) $0\r\n"
/bin/echo -en "Date: $(TZ=GMT date '+%a, %d %b %Y %T %Z')\r\n"
/bin/echo -en "\r\n"
cat $image.txt
chmod a+r $image

I keep a copy of the image and the response in case I need to retain the model. The image is sent over the jetson, where I have a Flask app running. I wasted a ton of time trying to get Flask to work, basically, if you use debug mode, then OpenCV doesn’t work because of different context loading. I could not seems to get Flask to keep the GPU opened for the life of the request, so on each request I open the GPU and load the model. This is quite inefficient as you may imagine. I also experimented with having the Raspberry Pi stream the video all the time over rtsp and then having ffmpeg save an image when it needs it. The problem seemed to be ffmpeg wasn’t always reliable. If I ran it for a single snapshot, it would not always capture an image. If I ran it continually, after some time it would exit. I have it trained to recognize four objects. If use my tool bucket as a source of truth. If it sees that, then I can assume it’s working, otherwise, I don’t have reliable enough information.
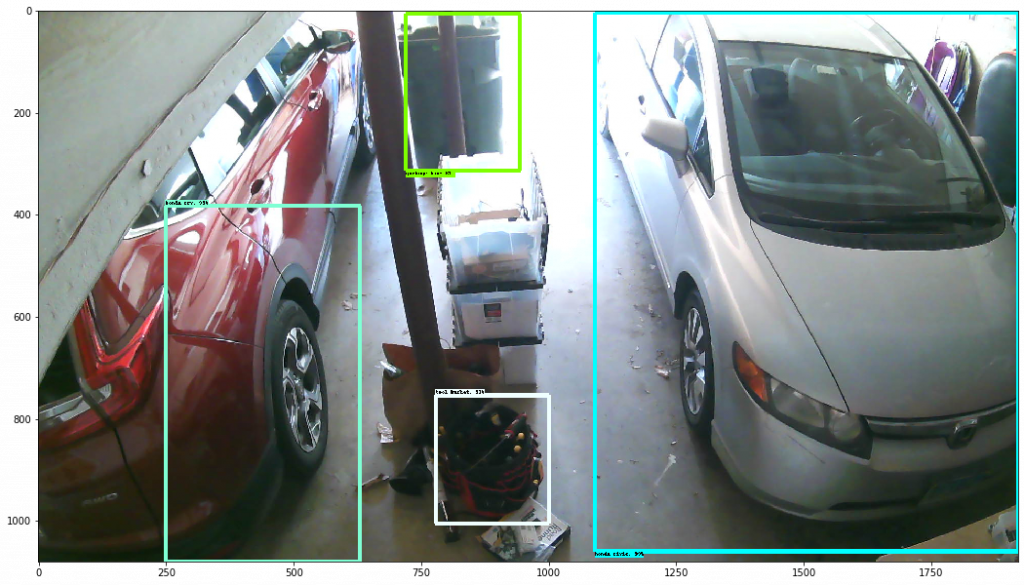
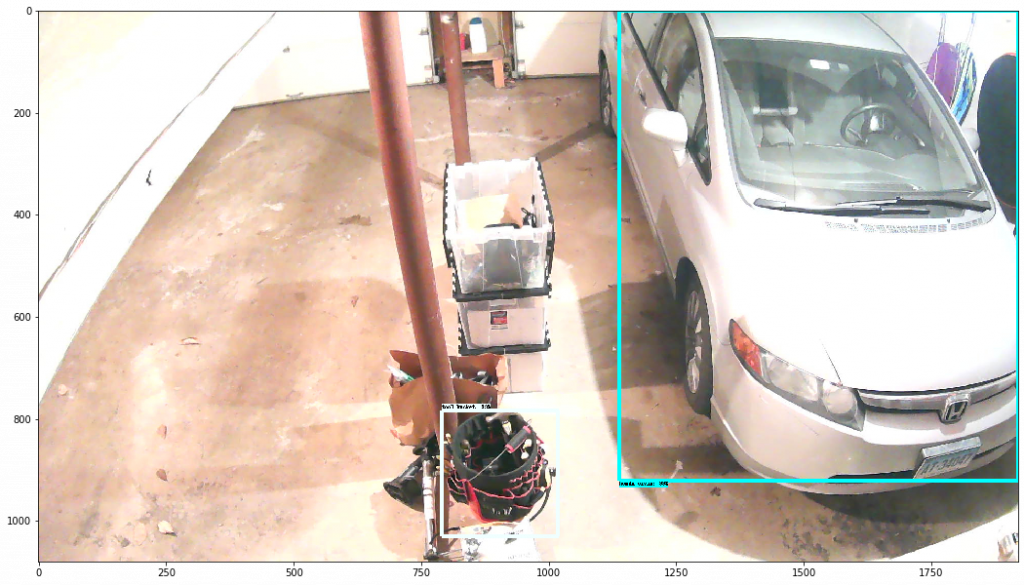
The scripts which I adapted are here: https://github.com/brianegge/garbage_bin

I’d like to use a ESP Cam to detect if a I have a package on my front steps. Maybe this will be my next project before I work on detecting deer.

Boiler Room Pipe Temperatures

I run SmartThings and Konneced for my home automation. I decided I could get some data on my boiler and hot water usage by monitoring the pipe temperatures with some cheap DS18B20 probes off Amazon.

Parts:
DS18B20 Five for $11.99 on Amazon
20′ of Shielded Low Voltage Security Alarm Wire
6′ of Aluminum tape
1 Mini PCB Prototype Board
1 4K7 resistor
A few shrink tubings

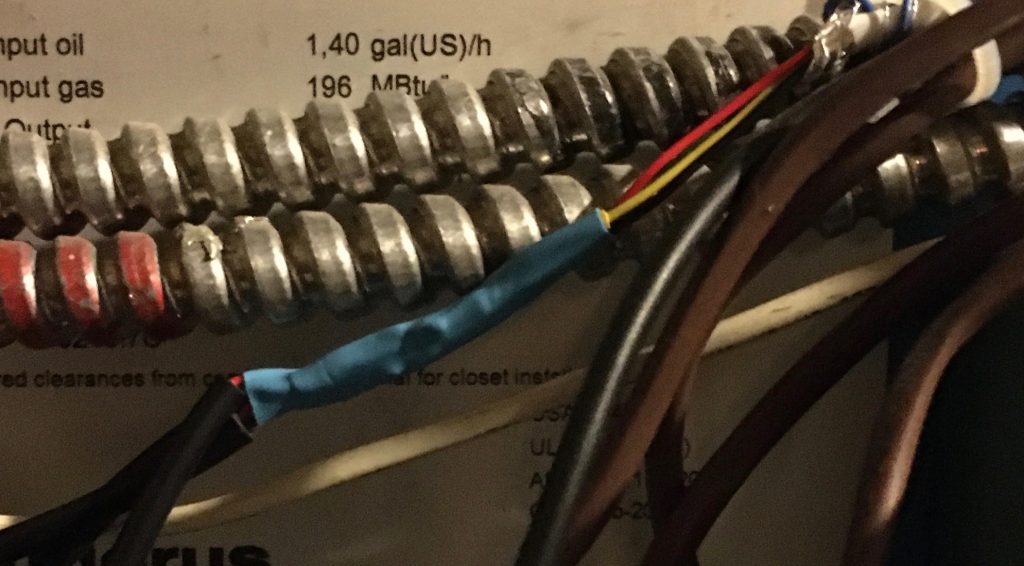
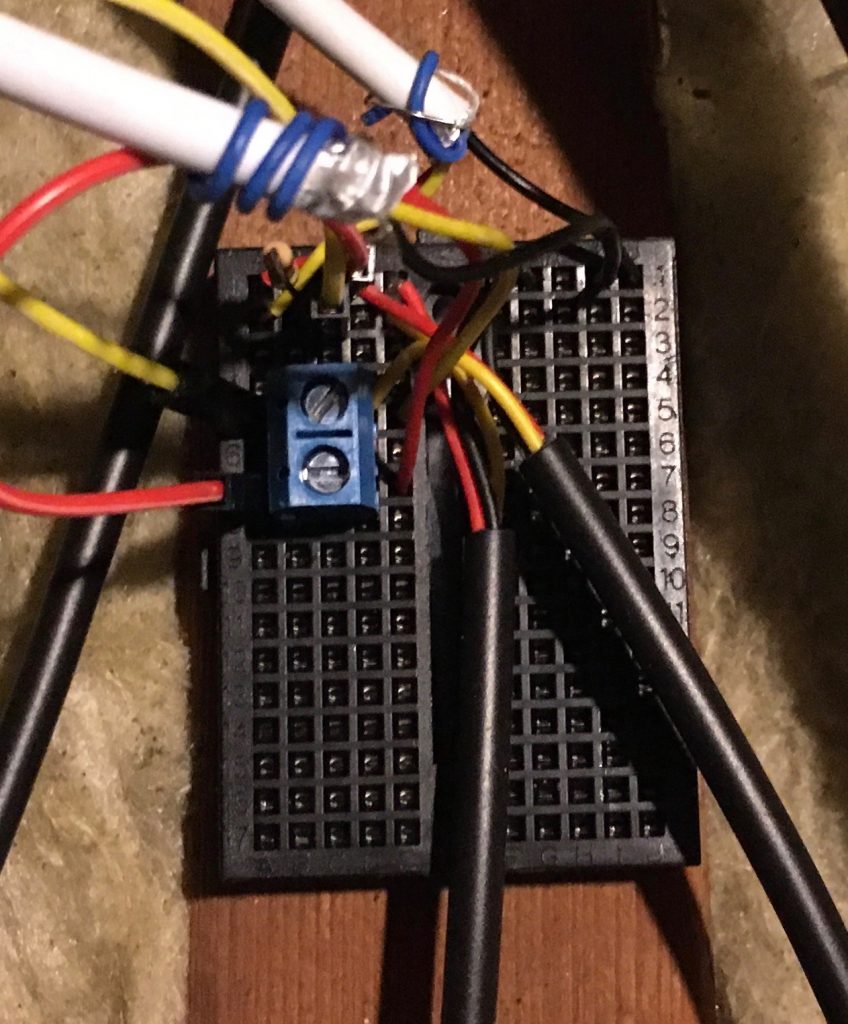
I used a Konnected add on board, put and connected my security wire to it. I tied the yellow wire to Pin 6, the black to the adjacent ground and the red to the +5v via a dupont wire. Next I ran the security wire over to my indirect hot water heater, where I connected two DS18B20’s and another cable over to my boiler. I used a prototype board because it was not an easy place to solder and though, I guess I could have done the soldering on the bench and then run the wire, as I did with my second run. I added the 4K7 pull up resistor here. I couldn’t get on of the yellow wires to insert into the prototype board, so I pushed in a header.

On my workbench I soldered three DS18B20 to one security wire and shrink tubed each wire plus a shink tube over all three. Effectively I have a star design.

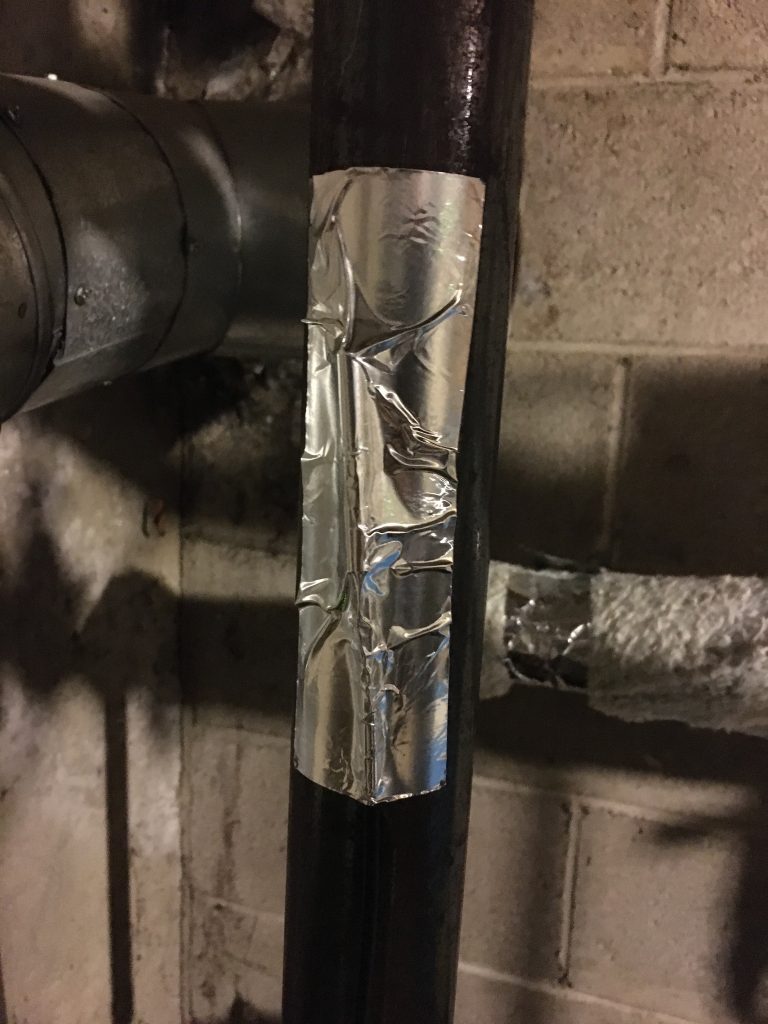
I placed the probes on the pipe an attached with aluminum tape. I then wrapped some insulation over the taped section.

I configured Konnected to poll every minute instead of every three. The devices appeared SmartThings shortly after I configured pin 6 to be a temperature probe.

My next task was to get the data recorded in my Raspberry Pi. For that I’m using InfluxDB and Grafana, following this guide: http://codersaur.com/2016/04/smartthings-data-visualisation-using-influxdb-and-grafana/

Smart Air Freshener

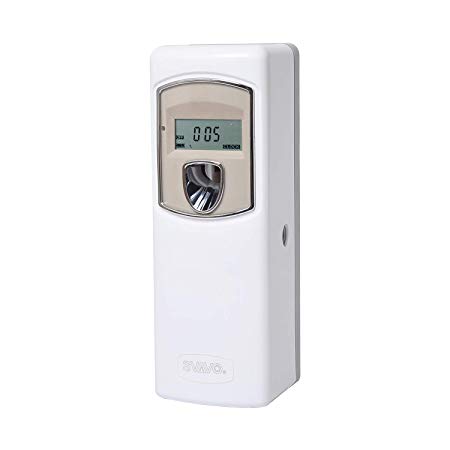
My wife asked for us to have an air freshener installed in the bathroom. I don’t like the plug in types, even if they don’t burn your house down. At my office we have air fresheners which run on a schedule, or maybe run 24×7, but seem to spray every fifteen minutes. I found a model on Amazon which was similar:

SVAVO Automatic LCD Fragrance Dispenser

This would probably work OK an in office, where you program it 9-5 M-F, but at home the schedule is not so easy. For one, we don’t want it going off when we’re asleep or not home. That’s trivial to set up a home automation to do that, but I could find no air fresheners which would connect to SmartThings.

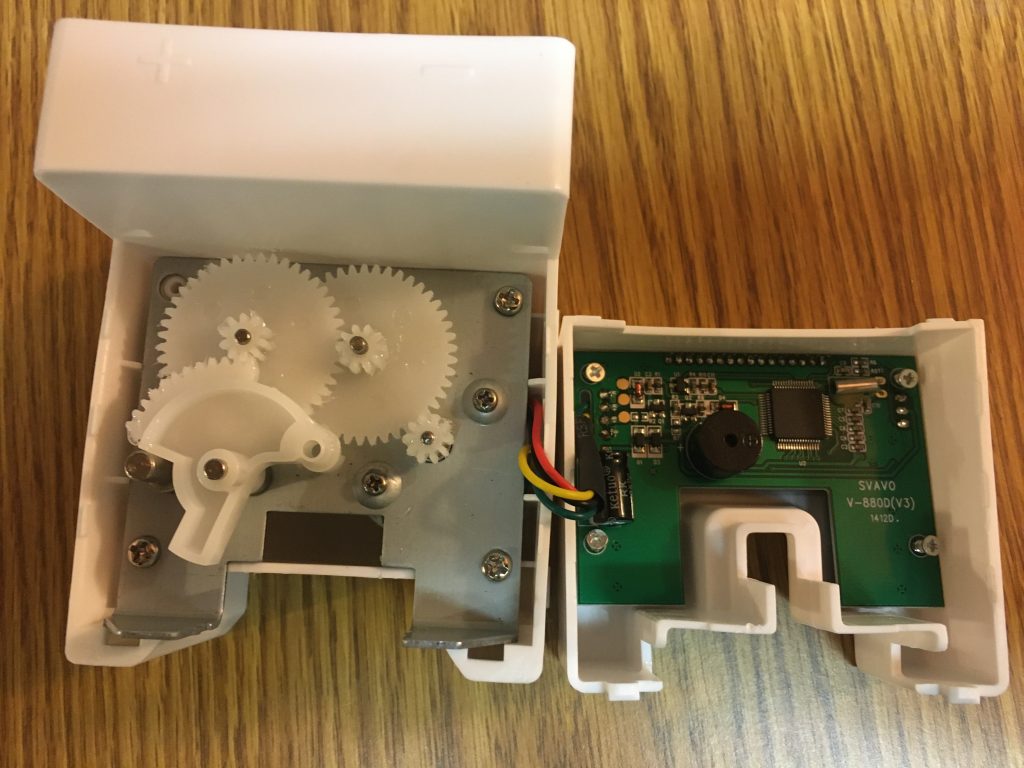
I decided to order the device and hack the motor to be controlled via SmartThings. Opening the device up, I found it ran on 3.2v via 2 AA batteries and had a simple PCB with two wires for the battery and two for the PCB. The PCB even had pads which I assume one could reprogram the controller. If the controller had a radio, my approach my have been to try to hack it. However, I assumed it didn’t, so I unsoldered the green(-) and yellow(+) wires from the motor.

It’s difficult to have a wifi device connected via batteries, so I decided I’d convert the device to run off of 5V micro-usb. This was easily powered via an ethernet cable and POE adaptor dropped down from my attic.

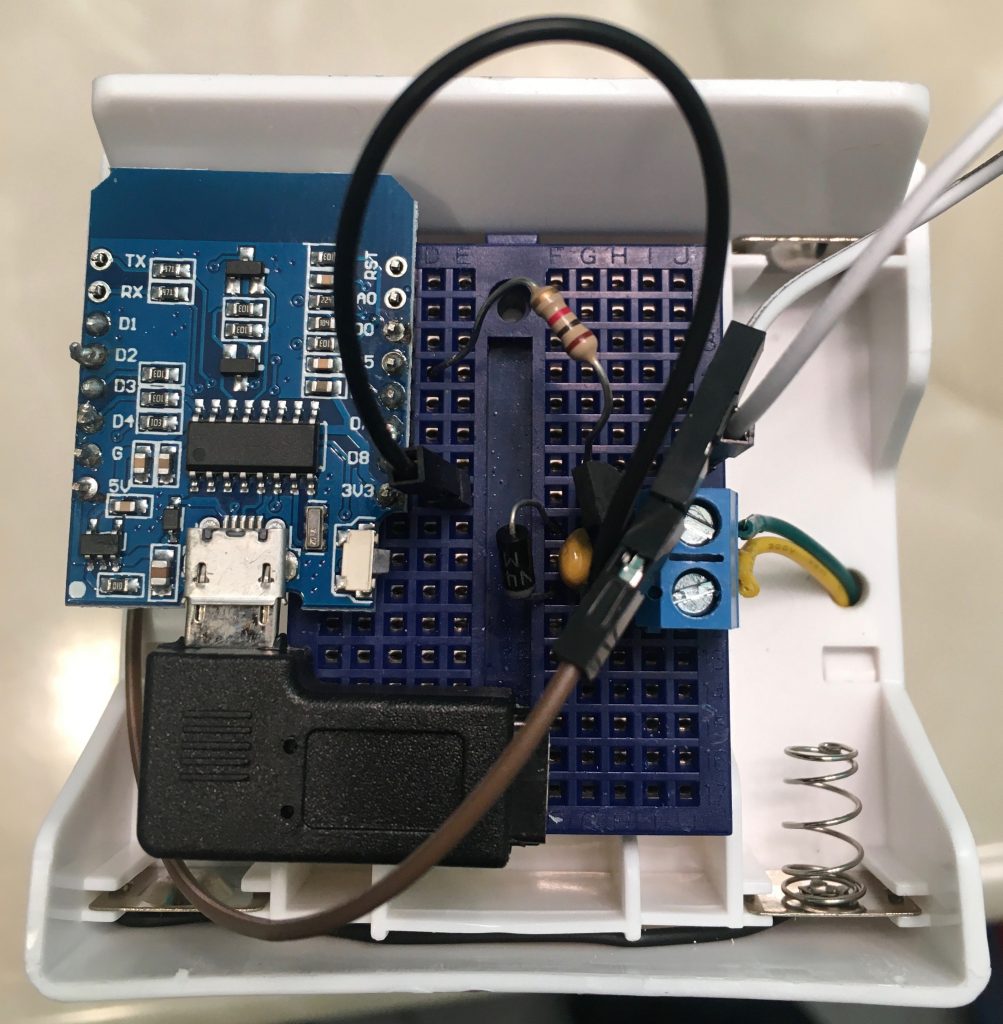
Wemos D1 Mini inside battery cabinet

Fortunately, the battery compartment had a generous amount of space. I decided to use the Wemos D1 Mini because of its small size and I flashed the Konnected firmware on. Using Konnected allowed for quick integration into SmartThings.

Once I had the software / hardware working, I mounted it on the wall. Because SmartThings has connections to Alexa and Google home, it was easy to get the voice assistants to activate the air freshener as well.

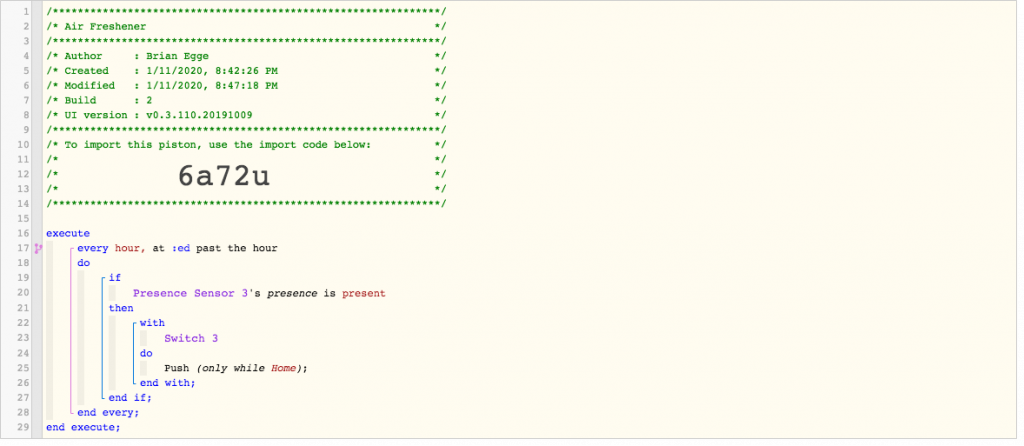
I created a basic piston to run it once an hour when my wife is home and not asleep. I also setup a routing to run it once when she first arrives home.

The Final Product!

Parts List:

I spent $35.97 on the air freshener and sprays, $21.64 on the parts for a total of $57.61. Most of the cost was my POE power supply and adaptor.

Connecting Novostella 20W Smart LED Flood Lights to SmartThings

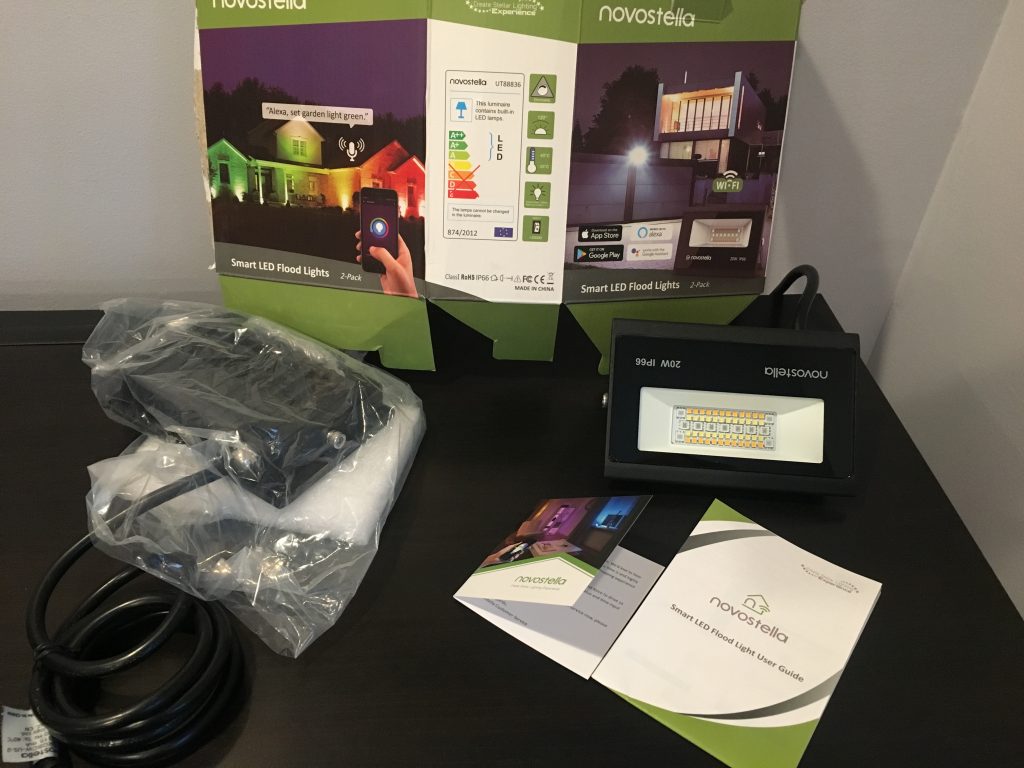
I purchased of pair of LED flood lights for my home from Amazon. I’ve looked at the Philips Hue lights which look nice but are very expensive ($330). The Novostella were $35 each when I purchased them. The main problem with lights like this is they come with an app, and they can only be controlled from that app or applications which work with it’s cloud account. Changing the firmware should be easy and would allow it to work with any app or home automation system.

20W is very bright!

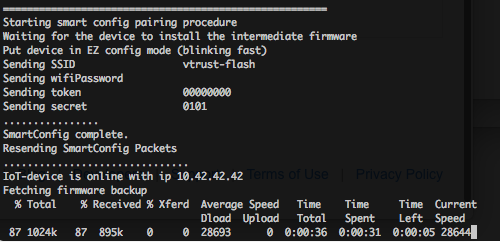
They appear to be ESP8266 based, so I should be able to flash them OTA using Tuya OTA. I used my Raspberry Pi 3 for the OTA flashing following this guide. The only issue I ran into is I plugged my lamp in too soon as it went out of the flashing light mode. There are no switches on the lamp, so the procedure is to plug in, unplug, plug in, unplug, plug in. Then it will resume blinking and the OTA software will work.

I found it’s quite important to attach the antennas before starting, otherwise, it may work but will be quite slow.

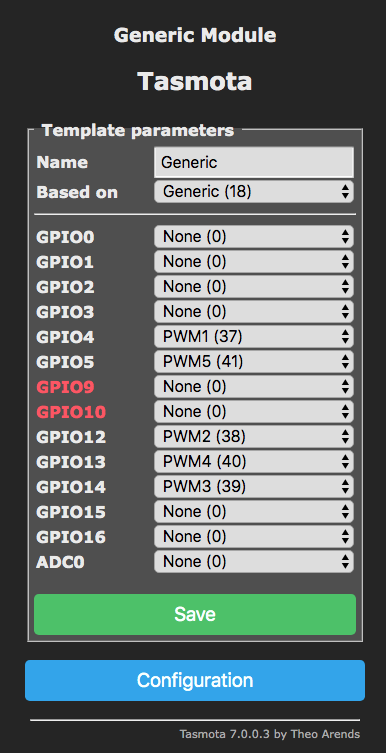
I checked my router for the device in the DHCP and connected to the web server. I setup the template as follows:

{"NAME":"Generic","GPIO":[0,0,0,0,37,41,0,0,38,40,39,0,0],"FLAG":0,"BASE":18}

The web UI lets you adjust the brightness and the white balance, but not the color. I tested the color command and got a nice blue:

Color 1845FF0000

Next, I wanted to connect to SmartThings. I installed this DHT https://github.com/GaryMilne/Tasmota-RGBCCT-DH-for-SmartThings-Classic-with-MQTT

I forked and installed the “Holiday Color Lights” SmartApp to automate changing the color of the lights with the season. It needs some work to be able to handle relative dates, like Fourth Thursday of the month. I modified it to use “white” for default when there isn’t a holiday.

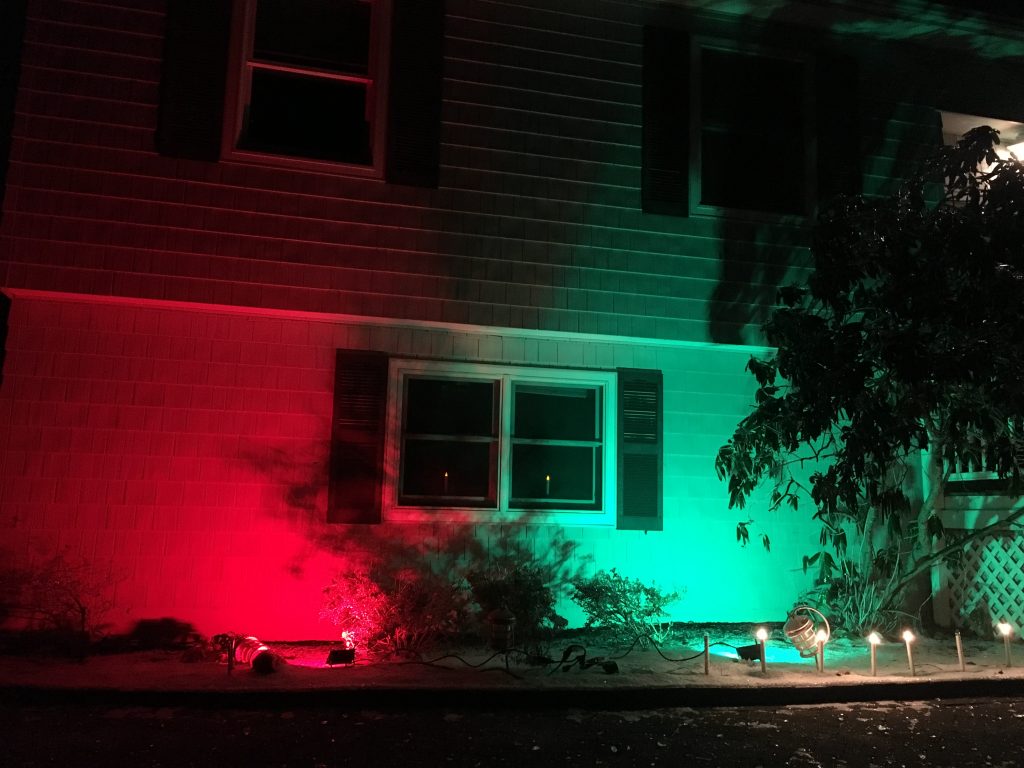
I think the end result looks pretty good. I’ll be ordering two more of these.

Replacing MR77A Fan Receiver with Hampton Bay Universal Wink Enabled White Ceiling Fan Premier Remote

My home came with a nice ceiling fan but no remote. The wall switch would turn the fan on/off, but it would only run at it’s slowest setting. I needed to replace the control or the fan so I could make use of it. Since I recently stated dabbling with home automation I decided to find a fan controller which I could control via SmartThings. I found the Hampton Bay Universal Wink Enabled device and it looked like it would work SmartThings and my fan. This fan control is also known as “King of Fans Wink Enabled White Universal Ceiling Fan Premier Remote Control“.

My plan was to replace whatever was in my lower canopy with the wink device. Reading the wink instructions, it says it’s designed to sit above the fan. Upon taking my fan apart, the cabling only supports having the receiver in the lower section of the fan.

Inside my canopy, I found an MR77A puck.

Before throwing the puck away, I needed to remove the cabling harness connector and also the capacitors. The puck works by using relays to control the capacitance on the starting/running loop. The greater the capacitance the faster the fan spins.

First, I wanted to get the fan going full speed with the puck removed. I took the three large capacitors and connected them in parallel to form a single one.

I tested the capacitance:

Then I soldered the leads along with two wires to my new capacitor:

My harness contained the following wires:

White (neutral to wall switch)
Black (hot to wall switch)
Thin black (antenna wire, absent from the fan connector)
Thin white (coil 1+)
Thin gray (coil 1-)
Thin brown (coil 2+)
Thin blue (coil 2-)

To run the fan without the wink module, I connected the black wire to the gray and brown wires and the white wire to the the thin white and to one side of the capacitor. The other side of the capacitor I connected to the blue wire. This mean when the circuit was powered, the white/gray circuit would get energized and the blue/brown would get power 90º shifted. With this setup, the fan operated on fast speed in a clockwise (summer) direction.

Once I proved the fan could work without the MR77A puck, I could then go on to getting the wink module connected. At this point I also wrapped my capacitors in electrical tape.

The wink module contained five labeled wires:

Right side:
Red (hot)
White (neutral)
Left side:
Black (fan hot)
Blue (light hot)
White (fan neutral)

I disconnected the thick white and black wired and attached the red and white wires to those. I then connected what had been connected to the thick black and white to the black and white wires on the left side of the wink module.

I plugged this into the fan and tested the included remote. This worked fine, though the lower two speeds hardly move the fan at all. The MR77A was a bit more clever in how it controlled the speed by adjusting the capacitance of the second coil.

When I first found the device in SmartThings it simply showed “Thing”. When I added it, it was stuck in “Please Wait”.

I found I needed to install the community written drivers for these fans. Fortunately, I had done this once before with Konnected, so I knew the process of how to add the Smart App and the Device Driver. The github repo is https://github.com/dcoffing/KOF-CeilingFan, so one add “dcoffing” for the GitHub user and “KOF-CeilingFan” for the project. After adding and publishing these I removed and added the fan again (going through the five 3-second on/off steps to reset the device). With this setup, I was soon able to control my fan:

With this working, I then replaced the metal canopy cover on the fan. The wink radio work fine however the remote control stopped working when the canopy was on. Unfortunately, the ‘antenna’ wire on the harness doesn’t go up the rod, so couldn’t route the antenna to the ceiling. Instead I drilled a 4mm hole in the metal canopy and pulled the antenna through. I found it had to be several inches outside the canopy on order for the remote to work from across the room.

I setup a virtual thermostat, using my Ecobee remote for both presence and temperature. My fan does not contain a light. If I’m ambitious, this winter I’ll open the fan up, and connect a polarity reversing relay to the light, that way I can reverse the fan using the ‘light’ switch. I’ll then customize my driver so instead of a light switch, it’ll present itself as a forward / reverse switch.

With that, my project was complete. Since it was non-trivial replacing the MR77A puck with the Hampton Bay device, I thought I’d share in case someone want to try the same.