After a previous in-place upgrade from Buster to Bookworm bricked a headless Pi (sshd broke when libc6 was upgraded past what the old openssh-server binary could handle, requiring recovery via a privileged Docker container with chroot), I switched to a clean install strategy: flash a new SD card, configure it headless, and keep the old card as a fallback.
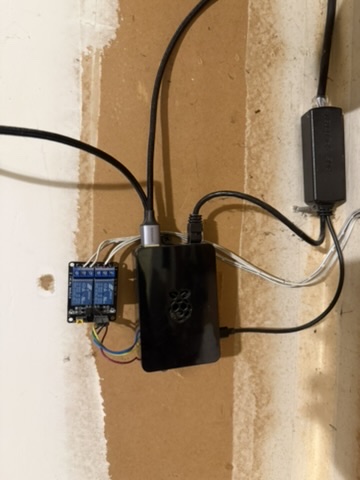
This post documents the process for two Pi Zero W boards — one running a custom MQTT service, the other running NUT (Network UPS Tools). The approach works for any headless Pi.
Why Clean Install Instead of In-Place Upgrade
An in-place apt dist-upgrade across major Debian releases is risky on a headless Pi. The core problem: package upgrades happen sequentially, and there’s a window where libc6 has been upgraded but openssh-server hasn’t been replaced yet. The old sshd binary can’t load the new libc, and you lose your only way in.
A clean install on a separate SD card avoids this entirely:
- Zero risk of bricking — the old card is untouched
- No orphaned packages or stale config from previous releases
- Rollback is just swapping the SD card back
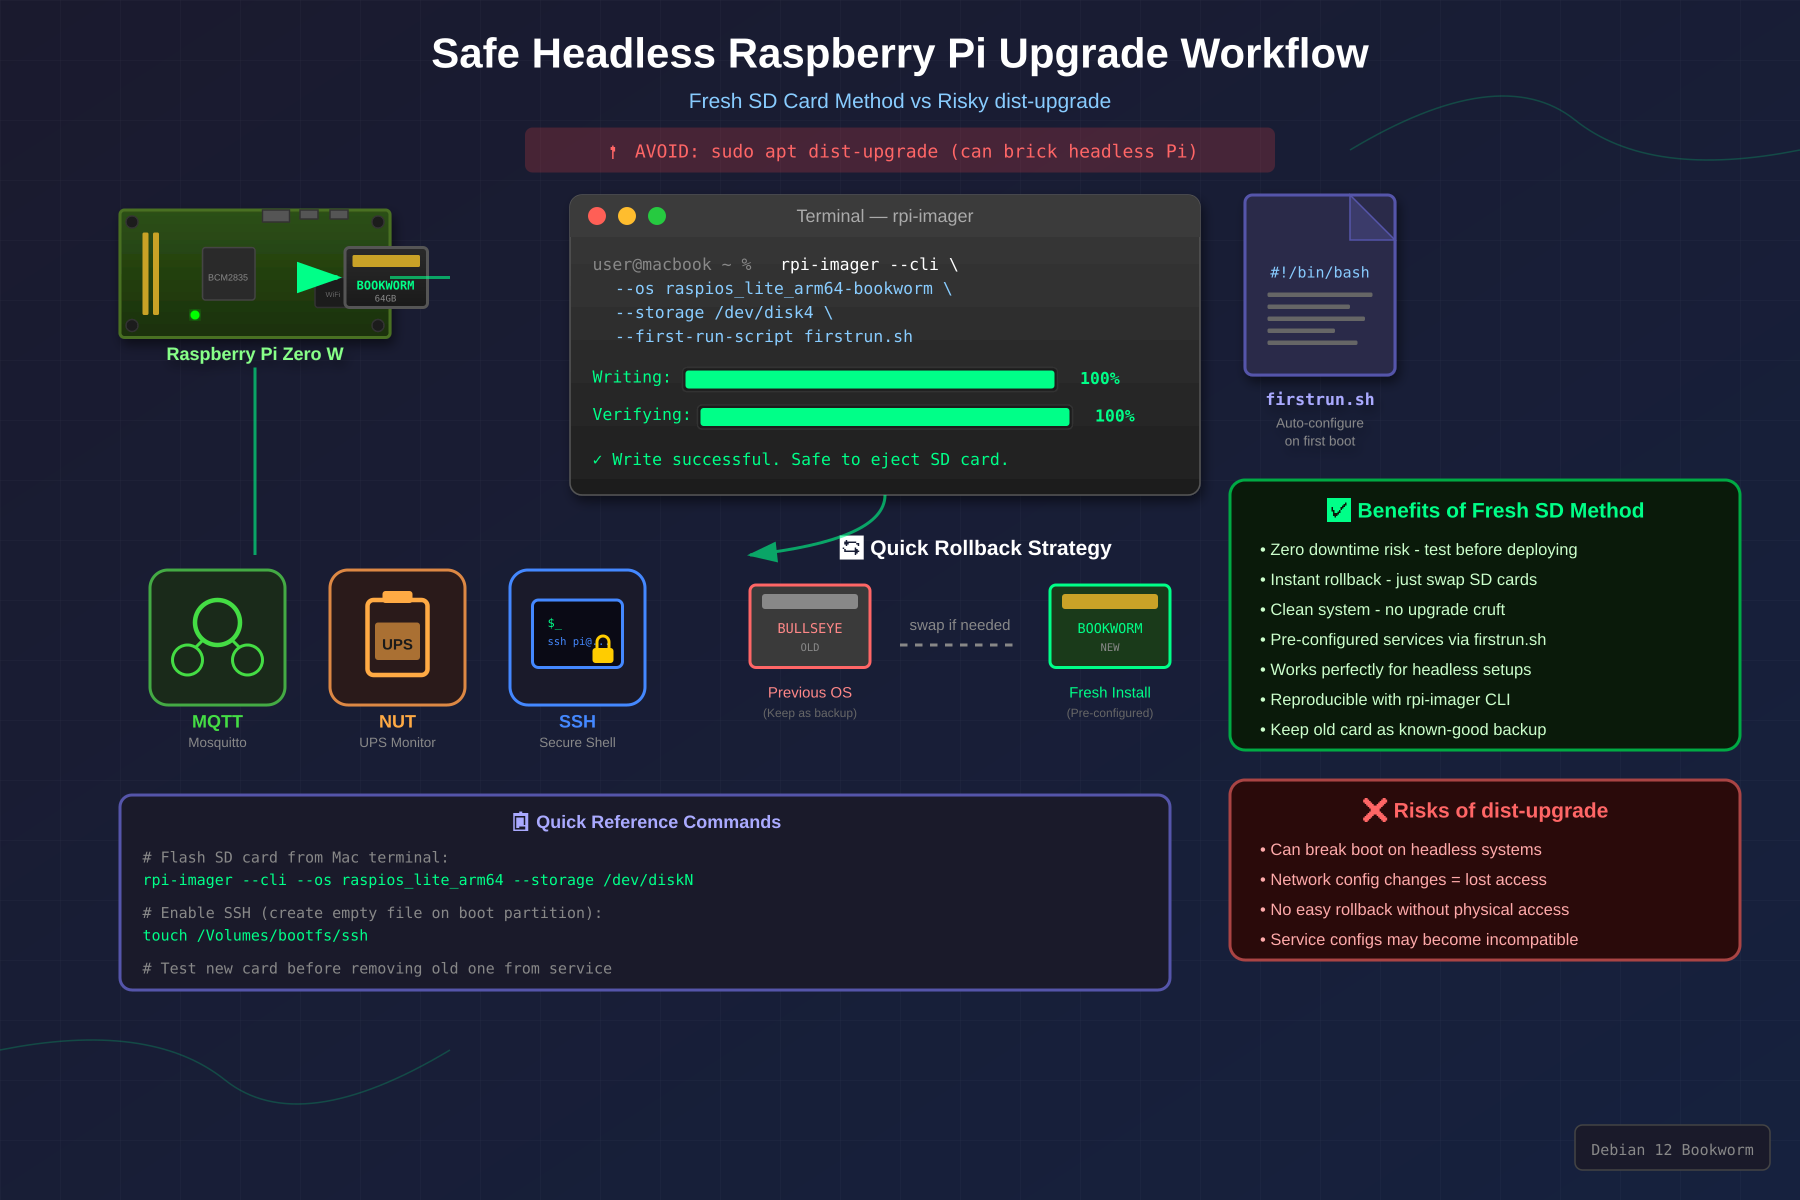
Step 1: Flash with rpi-imager CLI
The Raspberry Pi Imager has a --cli mode that handles everything dd does, plus headless configuration via a firstrun.sh script. No GUI needed.
Install the Imager
brew install --cask raspberry-pi-imagerDownload the Image
For the Pi Zero W (armv6l), you need the 32-bit armhf image — 64-bit won’t boot.
curl -L -o ~/Downloads/raspios-bookworm-armhf-lite.img.xz
  "https://downloads.raspberrypi.com/raspios_lite_armhf/images/raspios_lite_armhf-2025-05-13/2025-05-13-raspios-bookworm-armhf-lite.img.xz"
Create a firstrun.sh Script
On Bookworm, the old method of dropping ssh and wpa_supplicant.conf files into the boot partition no longer works. Bookworm uses NetworkManager instead of wpa_supplicant, and requires a first-run script for headless setup.
The script follows the same pattern the Raspberry Pi Imager GUI generates internally. It tries the imager_custom utility first (available on recent Raspberry Pi OS images), falling back to manual configuration:
#!/bin/bash
set +e

# --- Hostname ---
CURRENT_HOSTNAME=`cat /etc/hostname | tr -d " tnr"`
if [ -f /usr/lib/raspberrypi-sys-mods/imager_custom ]; then
   /usr/lib/raspberrypi-sys-mods/imager_custom set_hostname myhostname
else
   echo myhostname >/etc/hostname
   sed -i "s/127.0.1.1.*$CURRENT_HOSTNAME/127.0.1.1tmyhostname/g" /etc/hosts
fi

# --- SSH ---
FIRSTUSER=`getent passwd 1000 | cut -d: -f1`
FIRSTUSERHOME=`getent passwd 1000 | cut -d: -f6`

if [ -f /usr/lib/raspberrypi-sys-mods/imager_custom ]; then
   /usr/lib/raspberrypi-sys-mods/imager_custom enable_ssh
else
   systemctl enable ssh
fi

# --- User and Password ---
# Generate the hash with: echo 'yourpassword' | openssl passwd -6 -stdin
PWHASH='$6$xxxx...your-hash-here'

if [ -f /usr/lib/userconf-pi/userconf ]; then
   /usr/lib/userconf-pi/userconf 'pi' "$PWHASH"
else
   echo "$FIRSTUSER:$PWHASH" | chpasswd -e
   if [ "$FIRSTUSER" != "pi" ]; then
      usermod -l "pi" "$FIRSTUSER"
      usermod -m -d "/home/pi" "pi"
      groupmod -n "pi" "$FIRSTUSER"
      if grep -q "^autologin-user=" /etc/lightdm/lightdm.conf ; then
         sed /etc/lightdm/lightdm.conf -i -e "s/^autologin-user=.*/autologin-user=pi/"
      fi
      if [ -f /etc/systemd/system/getty@tty1.service.d/autologin.conf ]; then
         sed /etc/systemd/system/getty@tty1.service.d/autologin.conf -i -e "s/$FIRSTUSER/pi/"
      fi
      if [ -f /etc/sudoers.d/010_pi-nopasswd ]; then
         sed -i "s/^$FIRSTUSER /pi /" /etc/sudoers.d/010_pi-nopasswd
      fi
   fi
fi

# --- WiFi ---
if [ -f /usr/lib/raspberrypi-sys-mods/imager_custom ]; then
   /usr/lib/raspberrypi-sys-mods/imager_custom set_wlan 'YOUR_SSID' 'YOUR_PASSWORD' 'US'
else
cat >/etc/wpa_supplicant/wpa_supplicant.conf <<'WPAEOF'
country=US
ctrl_interface=DIR=/var/run/wpa_supplicant GROUP=netdev
ap_scan=1

update_config=1
network={
    ssid="YOUR_SSID"
    psk=YOUR_PASSWORD
}

WPAEOF
   chmod 600 /etc/wpa_supplicant/wpa_supplicant.conf
   rfkill unblock wifi
   for filename in /var/lib/systemd/rfkill/*:wlan ; do
       echo 0 > $filename
   done
fi

# --- Locale and Timezone ---
if [ -f /usr/lib/raspberrypi-sys-mods/imager_custom ]; then
   /usr/lib/raspberrypi-sys-mods/imager_custom set_keymap 'us'
   /usr/lib/raspberrypi-sys-mods/imager_custom set_timezone 'America/New_York'
else
   rm -f /etc/localtime
   echo "America/New_York" >/etc/timezone
   dpkg-reconfigure -f noninteractive tzdata
cat >/etc/default/keyboard <<'KBEOF'
XKBMODEL="pc105"
XKBLAYOUT="us"
XKBVARIANT=""
XKBOPTIONS=""

KBEOF
   dpkg-reconfigure -f noninteractive keyboard-configuration
fi

# --- Clean up ---
rm -f /boot/firstrun.sh
sed -i 's| systemd.run.*||g' /boot/cmdline.txt
exit 0
Generate the password hash on your Mac:
echo 'yourpassword' | openssl passwd -6 -stdinFlash the Card
Find your SD card:
diskutil list externalFlash it (replace /dev/disk5 with your device):
diskutil unmountDisk /dev/disk5

/Applications/Raspberry Pi Imager.app/Contents/MacOS/rpi-imager
  --cli
  --first-run-script firstrun.sh
  ~/Downloads/raspios-bookworm-armhf-lite.img.xz
  /dev/disk5
The imager writes the image, verifies the hash, injects firstrun.sh into the boot partition, and appends a systemd.run directive to cmdline.txt so the script runs on first boot. It then auto-ejects the card.
Output looks like:
  Writing: [-------------------->] 100 %
  Verifying: [-------------------->] 100 %
Write successful.
Step 2: Boot and SSH In
Remove the old host key (the new OS has a new one):
ssh-keygen -R myhostname.homeInsert the card, power on the Pi, wait about 90 seconds, then:
ssh pi@myhostname.home
ssh-copy-id pi@myhostname.home
If it doesn’t resolve right away, the router may need a DHCP cycle to learn the new hostname. You can connect by IP in the meantime (check your router’s DHCP leases or use arp -a).
Step 3: Configure Services
Example: Python Service with pip
Bookworm enforces PEP 668 (externally managed Python), so pip install --user requires --break-system-packages:
sudo apt update
sudo apt install -y python3-pip git

pip install --user --break-system-packages --upgrade pip
git clone https://github.com/youruser/yourproject.git
cd yourproject
pip install --user --break-system-packages .
The binary lands in ~/.local/bin/. A systemd service file can reference it directly:
[Unit]
Description=My Service
After=network-online.target
Wants=network-online.target

[Service]
Type=simple
User=pi
EnvironmentFile=/home/pi/yourproject/config.env
ExecStart=/home/pi/.local/bin/yourcommand
Restart=always
RestartSec=30

[Install]
WantedBy=multi-user.target
Install and enable:
sudo ln -sf /home/pi/yourproject/myservice.service /etc/systemd/system/
sudo systemctl daemon-reload
sudo systemctl enable --now myservice
Example: NUT (Network UPS Tools)
sudo apt install -y nutNUT needs five config files in /etc/nut/:
nut.conf — set the mode:
MODE=netserverups.conf — define the UPS (find your vendor/product IDs with lsusb):
[myups]
  driver = usbhid-ups
  port = auto
  desc = "My UPS"
  vendorid = 09ae
  productid = 2012
upsd.conf — listen on the network:
LISTEN 0.0.0.0 3493upsd.users — define monitoring users:
[upsmon]
  password = secret
  upsmon master

[homeassistant]
  password = secret
  upsmon slave
upsmon.conf — local monitor:
MONITOR myups@localhost 1 upsmon secret masterEnable and start:
sudo systemctl enable --now nut-server nut-monitorNote: on Bookworm, the NUT driver is no longer a single nut-driver.service. It uses nut-driver-enumerator to create per-UPS instances like nut-driver@myups.service. These start automatically based on ups.conf.
Verify:
upsc myups@localhostUSB Permissions
The nut package ships a udev rule (/lib/udev/rules.d/62-nut-usbups.rules) that grants the nut group access to supported UPS devices. If the UPS was plugged in before the package was installed, a reboot is needed for the rule to take effect. After reboot, ls -la /dev/bus/usb/001/ should show the UPS device owned by root:nut.
Do not run udevadm trigger on a running system to fix this — on a Pi Zero W with limited RAM, it can destabilize the system if the NUT driver is crash-looping. A clean reboot is safer.
SNMP
sudo apt install -y snmpd snmpWrite /etc/snmp/snmpd.conf:
agentaddress udp:161,udp6:161

rocommunity MYCOMMUNITY  default
rocommunity6 MYCOMMUNITY  default

sysLocation    Home
sysContact     admin@myhostname

view   systemonly  included   .1.3.6.1.2.1.1
view   systemonly  included   .1.3.6.1.2.1.25.1
Note: install the snmp package (client tools) separately from snmpd (daemon). Bookworm doesn’t ship MIB files by default, so use numeric OIDs to verify:
sudo systemctl enable --now snmpd
snmpwalk -v2c -c MYCOMMUNITY localhost .1.3.6.1.2.1.1
Step 4: Set Up Backups
Generate an SSH key and copy it to your backup server:
ssh-keygen -t ed25519 -N ""
ssh-copy-id user@backupserver
Add a weekly cron job:
(crontab -l 2>/dev/null; echo '@weekly rsync -avz /home/pi user@backupserver:/backups/myhostname/') | crontab -If the Pi can’t interactively authenticate to the backup server (no password prompt over SSH), you can push the key from your workstation instead:
# On your Mac/workstation:
PI_PUBKEY=$(ssh pi@myhostname.home "cat ~/.ssh/id_ed25519.pub")
ssh user@backupserver "echo '$PI_PUBKEY' >> ~/.ssh/authorized_keys"
Step 5: Verify and Retain Rollback
After setup, do a full check:
ssh pi@myhostname.home "
  /usr/sbin/sshd -V 2>&1;
  sudo systemctl is-active myservice;
  df -h /;
  uptime"
Expected:
- OpenSSH 9.2 (Bookworm native)
- Services active
- Disk usage well under capacity
Keep the old SD card as a rollback for at least a week. If anything goes wrong, power off, swap the old card back in, power on. The old system boots unchanged with all data intact.
Gotchas
PEP 668 on Bookworm. pip install --user fails without --break-system-packages. This is new in Bookworm. If you prefer isolation, use a venv instead, but you’ll need to adjust your systemd ExecStart path.
NUT driver service names changed. On Bullseye, it was nut-driver.service. On Bookworm, the driver uses a template unit: nut-driver@<upsname>.service, managed by nut-driver-enumerator. You can’t systemctl enable nut-driver — it doesn’t exist as a standalone unit.
DNS after hostname change. If you renamed the Pi (e.g., from raspberrypi-zwave to raspberrypi-ups), the router’s DNS may cache the old name. Bouncing the WiFi connection pushes the new hostname via DHCP:
sudo nmcli connection down preconfigured
sudo nmcli connection up preconfigured
The connection name preconfigured is what Bookworm’s firstrun.sh creates.
known_hosts after reflash. A fresh OS means new SSH host keys. You’ll get a scary REMOTE HOST IDENTIFICATION HAS CHANGED warning. Remove the old key for both the hostname and IP:
ssh-keygen -R myhostname.home
ssh-keygen -R 192.168.x.x
wpa_supplicant.conf doesn’t work on Bookworm. The old trick of creating /boot/wpa_supplicant.conf for headless WiFi no longer works. Bookworm uses NetworkManager. Use rpi-imager --cli --first-run-script instead.
SNMP MIBs not installed. snmpwalk ... system fails with Unknown Object Identifier. Use numeric OIDs (.1.3.6.1.2.1.1) or install the non-free MIBs package.
udevadm trigger on a Pi Zero W. Avoid running this while a USB driver is crash-looping. The Zero W has 512 MB of RAM. A tight restart loop plus udev retriggering can exhaust memory and make the system unresponsive. Reboot instead.